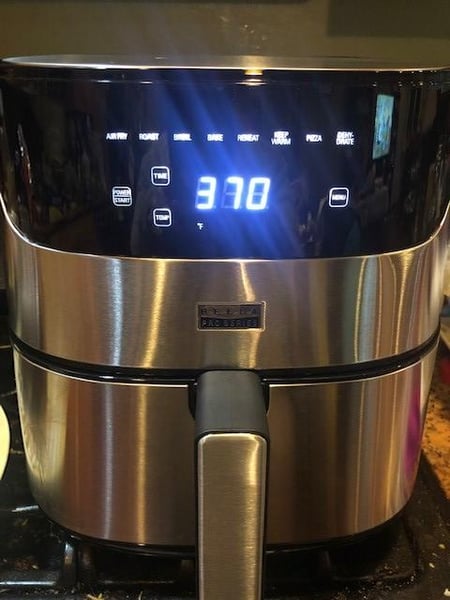
My fiancé touts himself as the superior gift giver in our relationship, and I really can’t argue his point. His gifts are thoughtful, practical and luckily for me, are often geared towards my love of food and wine. He’s given me a wine purse (yes, a purse that you actually pour a full bottle of wine in, and it has a concealed spout) – perfect for picnics, movies in the park, outdoor concerts, etc. He’s given me a Nespresso coffee machine and milk frother – perfect for all those cold Chicago winter days when I want to play barista at home. But by far, the best kitchen gift he’s given me is my….(drum roll)…. air fryer!

Ultimately, you’ll need to decide on a size, and between the two basic styles. Most air fryers are either basket style or shelf style. When deciding which you’d prefer, you’ll want to take into consideration the number of people you typically cook for and the quantity of food you make. I currently have a 6 quart basket style, but think I’ll eventually make the move to a 12 quart shelf style because it provides more cooking surface area.
If you’re wondering how an air fryer works, it’s similar to a convection oven. It blows hot air around the food which is what helps brown and crisp the food. The air fryer removes the need for that pot of oil on your stove spattering everywhere (though don’t get me wrong, that still creates delicious food and has its own purpose!). The air fryer works better for breaded, as opposed to battered foods, for example. While you don’t pour any oil into the air fryer, you can spray the food with a neutral, high smokepoint oil such as grapeseed or avocado oil – this also promotes browning.
If you’re wondering what to make next in your air fryer, I highly suggest trying my version of a blooming onion. It’s relatively simple and uses just a few ingredients you likely have in your pantry. And since it hasn’t been deep fried, you don’t have to feel nearly as guilty for eating the whole thing!
Air Fried Blooming Onion
Scroll down for a printable version of this recipe
Serves: 4
Prep Time: 10 minutes
Cook Time: 20 minutes
Total Time: 30 minutes
1 large onion
1 1/2 cups all-purpose flour
1 teaspoon cayenne
1 teaspoon granulated garlic
1 teaspoon salt
1 teaspoon pepper
1 teaspoon chili powder
2 eggs
1/2 cup milk
1/4 cup mayonnaise
1 Tablespoon horseradish
1 teaspoon ketchup
1/8 teaspoon pepper
1/8 teaspoon garlic powder
1. In a medium bowl, mix together flour and seasonings/spices. Set aside.
4. Cut off the stem (not root) end of the onion. It will be papery, not “hairy”.
7. Make 4 incisions, equidistant, in the onion, from the root down.
9. Make 8 more incisions in between the cuts already made.
10. Turn the onion over fan out the onion sections (so that it’s blooming like a flower!)
14. Spray the coated onion with grapeseed oil.
15. Air fry at 400 for 10 minutes.
16. Spray again with the grapeseed oil.
17. Air fry again for 10 more minutes or until golden brown and crispy.
18. Serve with sauce and enjoy!
- Virtual Friday Night Fish Fry Friday, March 5 6pm CST
- Virtual Sunday Dinner – Chicken Fried Steak, Sunday March 14 4pm CST
- Virtual Sunday Dinner – Crispy Pork Medallions, Sunday, March 21 4pm CST
- Virtual Take Out at Home – Nashville Hot Chicken Sandwich, Friday, March 26 7:15pm CST
Using your air fryer is this week's challenge for our private Facebook group. Make something in your air fryer and share it with other home cooks so that we can all inspire each other!
Air Fried Blooming Onion
Ingredients
- 1 large onion
- 1 1/2 cups all-purpose flour
- 1 teaspoon cayenne
- 1 teaspoon granulated garlic
- 1 teaspoon salt
- 1 teaspoon pepper
- 1 teaspoon chili powder
- 2 eggs
- 1/2 cup milk
- 1/4 cup mayonnaise
- 1 Tablespoon horseradish
- 1 teaspoon ketchup
- 1/8 teaspoon pepper
- 1/8 teaspoon garlic powder
Instructions
- In a medium bowl, mix together flour and seasonings/spices. Set aside.
- In another medium bowl, whisk together eggs and milk. Set aside.
- For the dipping sauce, in a small bowl, mix together mayonnaise, horseradish, ketchup, pepper and garlic powder. Set aside.
- Cut off the stem (not root) end of the onion. It will be papery, not “hairy”.
- Peel the onion.
- Sit the onion cut side down.
- Make 4 incisions, equidistant, in the onion, from the root down.
- Make another 4 incisions in between the first cuts.
- Make 8 more incisions in between the cuts already made.
- Turn the onion over fan out the onion sections (so that it’s blooming like a flower!)
- Dust the onion in the seasoned flour.
- Coat the floured onion in the egg/milk mixture.
- Coat the onion in the flour mixture again, and remove any excess flour (if you feel like you don’t have enough coating you can repeat with the egg and flour again.)
- Spray the coated onion with grapeseed oil.
- Air fry at 400 for 10 minutes.
- Spray again with the grapeseed oil.
- Air fry again for 10 more minutes or until golden brown and crispy.
- Serve with sauce and enjoy!
