Growing up, the annual ritual of dying Easter eggs was a big deal in my family. Not content to simply dip boiled eggs in brightly colored dyes, we were constantly looking for ways to make new and interesting effects. Tie-dying, wax dripping, smoke-staining, taping, blowing, and rubber-banding - we tried it all. Every year, there had to be something new. Our dyed eggs were so special that we saved particular favorites for years in the freezer and only ever hunted the plastic variety.

Well, it's been a few years since I last dyed eggs, but with a little munchkin around the house I decided it was time to revive the tradition. I looked to Pinterest for a little inspiration, but most things I found were either something I had already done or required ridiculous amounts of time and an art degree. Then I ran across the idea of dyeing eggs using pigments extracted from food. Eureka! It was the perfect project for a chef with a love for both science experiments and old-school traditions.
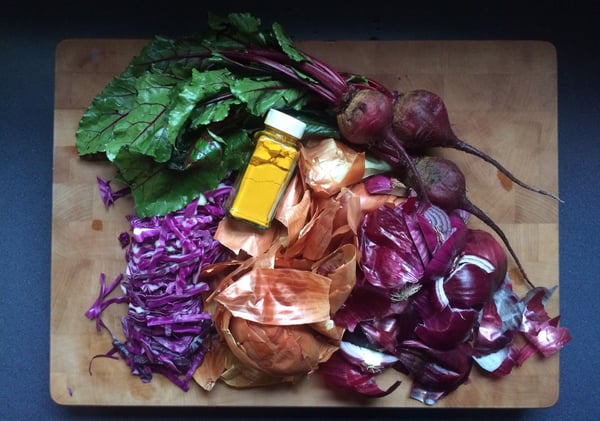
What I did not want to do, however, was run out and buy a bunch of perfectly good food and boil it into oblivion to color some eggs. I was determined to make a go of it with things that were already past their prime or slated for the trash - basically I went dumpster diving in my own fridge for anything brightly colored. I found red and yellow onion skins, some sad, squishy beets, leftover red cabbage, and I grabbed the turmeric from the pantry just for kicks. A $5 investment in a dozen each of white and brown eggs, and quick boil, and I was in business.

To help the pigments extract more quickly I chopped everything into small pieces before transferring each item to a medium sauce pan, and 4 cups of water, and slowly simmering it for 30 minutes. I them tested each dye liquid on a small white plate to test for color. The turmeric dye was very sludgy and when I couldn't find a good way to the filter out the powder, I discarded it.
Clockwise from top left: Beets, red onions, cabbage, and yellow onions
I gave the red onion dye 30 more minutes to extract and the color was significantly improved!
Once I was happy with the colors, I poured the dyes through a fine mesh strainer and transferred them to quart mason jars.
For every cup of liquid, I added 1 tablespoon of white vinegar, mixed well, and then added the eggs.
After 24 hours in the refrigerator, anda little polishing with some grapeseed oil, I had beautiful eggs to show for my efforts!
Cabbage - Green (brown eggs) and turquoise (white eggs)
Yellow Onion - Orange and bittersweet hues
Beets - Started out red but turned brown, dye may have been too acidic
Red Onion - Deep, rusty reds
If you'd like to try this project at home, here are a few quick tips:
- Look for flaked off onion skins in the bottom of the storage bins at your local produce market. Just give the employees a heads up that you want to clean their bin out and more than likely they'll let you take all you want! The more starting material you have, the more intense your dye will be.
- Use both white and brown eggs, or any other colors you can find as a starting point. The dyes created different and beautiful hues on each, and I got twice as many colors for the same amount of work!
- Need some grapeseed oil to give your Easter eggs the perfect shine? Come and get some at The Chopping Block and see our other beautiful Easter candies and decor.
Looking for other ways to make the most of your food budget and reduce waste? Check out Crystal's blog "10 Methods to Cook Your Way To A Clean Kitchen".
