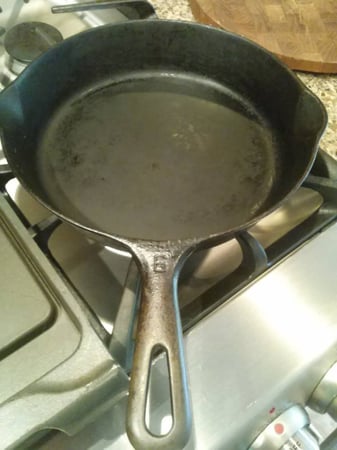
During my travels last month, I stayed with friends in their new house. As the curator of an amazing museum and an authority on rare books and maps, their lives are full of cool stuff. I expected their house to look exactly as it did: a comfy and welcoming private art exhibition. What I didn't expect was this little beauty right here.

For those of you not in the know, that is a classic Griswold Cast Iron Skillet, the pan my friends pulled out when I casually asked if they had any cast iron I could use to make breakfast. The Griswold Manufacturing Company, from Eerie Pennsylvania were some of the best cast iron manufacturers in the United States, back in the first half of the 1900s. They exemplify everything that makes classic cast iron so great: they're light, high quality and have a smooth finish that makes building up a good seasoning (the layer of polymerized oil that makes cast iron the best non-stick pan) really easy.
A year ago, this would have been just another pan to me and not one I would have wanted to use. Cast iron skillets don't work the same way most pans do. They require a different kind of upkeep and, if you treat them incorrectly, they can take a while to get back up to snuff. But I've spent the last few months working with this guy.
That's a Case cast iron, sort of the training wheels of the cast iron world, as far as I'm concerned. As a modern piece of cast iron, it's heavier than a Griswold and lacks the smooth finish on the inside. Plus, it's just a little cheaper than most cast iron on the market, which means that the pre-seasoning it came with wasn't very good. I've had to reseason it several times, which has taught me a lot about how cast iron works, and how to treat it.
Still, it's not what I'd recommend for a beginner. While I've been fiddling with heating temperature and watching videos on the best way to reseason a cast iron, my fiance has kept her hands off the thing. I can't really blame her, my skillet is pretty finicky. That's why The Chopping Block sells Lodge.
A Lodge cast iron skillet runs about $21, and comes with a preseasoning that's both even and hardy. It's widely considered the best cast iron on the market today, a little heavier than the antique skillets you'll find but hardy and high quality. They're what we make all of our Apple Fest pies in as well as other pies!
These are the Blueberry Cardamom pies from the Pies, Tarts, and Crostatas class I took with Chef Kim last month. For as fancy as they turned out looking, they're really easy to make! You can find the recipe below.
The pan I have at home is mostly for savory food, but I'll probably be getting a Lodge skillet soon so that I can make sweet things at home. Lucky for me, all cast iron will be 20% off in October!
Blueberry Cardamom Lattice Pie
Yield: One 8-inch pie
Active time: 45 minutes
Start to finish: 2 hours
1 recipe of pie dough (2 discs)
3 1/2 cups fresh or frozen blueberries
2 tablespoons all-purpose flour
1/2 cup granulated sugar
1/4 cup cornstarch
3/4 teaspoon ground cardamom
Pinch fine sea salt
1/4 teaspoon lemon zest
2 teaspoons lemon juice
2 tablespoons cold unsalted butter, cut into small pieces
Heavy whipping cream as needed for garnish
Granulated sugar as needed for garnish
1. Preheat oven to 350º.
2. Toss the blueberries with the flour to coat. Add the sugar, cornstarch, cardamom, salt, zest and juice, and mix well. Allow to sit while rolling out the dough.
3. Lightly dust a clean surface with flour and roll out one disk to about 1/8-inch thick. As you’re rolling, lift and turn the dough occasionally to ensure it does not stick. Gently roll the dough onto the rolling pin, lift, and place into the 8-inch cast iron skillet. Gently push the dough to fit the 8-inch skillet. Trim the edges so you have about 1-inch of dough on the edges all the way around.
4. Add the filling to the pie. Sprinkle pieces of butter on top of the filling.
5. Roll another disk into an 1/8-inch-thick circle. Cut the dough into 1/2-inch wide strips. Weave the strips in a crisscross pattern over the top of the fruit, leaving a 1/4-inch space between each strip. Trim any overhanging strips so they are even with the bottom crust edge, and then roll the bottom crust over the top and crimp to create a decorative border.
6. Brush the top of the pie with heavy cream and sprinkle generously with sugar.
7. Place the pie on a parchment-lined sheet tray, and bake for about one hour or until the filling is bubbly in the center.
8. Allow pie to cool before cutting and serving.
Want to learn how to perfect all kinds of pie? Our upcoming Pie & Tart Boot Camp is just for you!
