Butter is the backbone of most things delicious, but making your own cultured butter opens doors to a multitude of culinary endeavors. It's easy, requiring just a bit of patience and offering a burst of flavor at the end of the churn. While you can find cultured butter in many grocery stores today, crafting your own allows you to personalize it for spreading on bread, baking into cookies and crusts, or using as a dipping delight. It boasts a creamy richness like no other, with a tang and aroma unique to cultured dairy.
Cultured butter is a rich and flavorful delight made by fermenting cream with live cultures, typically lactic acid bacteria, and then churning to separate butter from buttermilk. This process gives the butter a tangy, complex flavor profile and a creamy texture that sets it apart from regular butter. Loved by chefs and food enthusiasts alike, it adds depth of taste and versatility to cooking and baking.
To make cultured butter at home, you start by culturing your cream with bacteria cultures from non-high-temperature pasteurized buttermilk or yogurt. This creates something familiar to many of us – crème fraîche. While store-bought crème fraîche is readily available, it's often pasteurized at high temperatures and homogenized, making it unsuitable for churning into butter. Making your own ensures the process is done right and is absolutely worth it!
For this recipe, use heavy cream and buttermilk that specify "low-temperature pasteurized." Look for dairy products that haven't been treated with high heat, usually available through smaller independent purveyors and stores. Unfortunately, unpasteurized dairy cannot be sold legally in the United States.
 Here's a simple recipe for homemade cultured butter:
Cultured Butter
Yield: 4-5 oz of butter
Prep time: 5-10 minutes
Inactive time: 24-36 hours
2 cups heavy cream
1/4 cup buttermilk
1. In a quart jar or container, combine the heavy cream and buttermilk. Stir to combine, cover with cheesecloth, and secure with a jar ring or rubber band. Allow to sit at room temperature (70-75°F) for 24-36 hours, until the cream has thickened to a sour cream-like consistency.
 2. Transfer the cultured cream to a mixing bowl or the work bowl of a standing mixer. Using a hand mixer or the paddle attachment of a standing mixer, whip the cream until it reaches an airy, soft texture resembling whipped cream.
3. Continue mixing until the cream appears gritty and starts to clump. Mix until you can see a mass of fat separating from its liquid.
 4. Line a mesh sieve with cheesecloth and strain the solids, reserving the liquid (buttermilk) for other culinary uses.
5. Gently squeeze the cheesecloth to remove excess moisture from the butter.
 6. Rinse the butter under cold running water 3 to 4 times, squeezing the cloth each time until the water runs clear.
7. You now have cultured butter and buttermilk. Store the buttermilk in the refrigerator for up to 7 days to use in recipes like pancakes, biscuits, or further dairy cultures (like more butter).
8. Season the butter to taste with sea salt and shape as desired. Spoon the butter onto a piece of parchment paper and roll it into a log, twisting the paper at both ends to tighten.
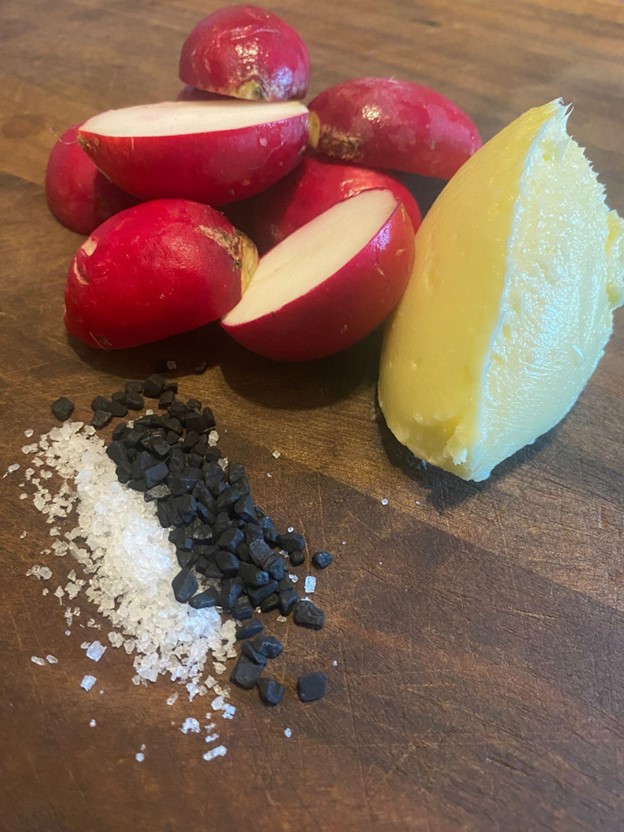
 Cultured butter can be refrigerated for up to 3 weeks or frozen for up to 9 months. It's a fantastic replacement for plain butter in any application where you want your butter flavor to shine with a bit of tang. Use it in shortbreads, pie crusts, or enjoy it spread on warm bread with a sprinkle of salt. My personal favorite is enjoying fresh radishes with some tempered butter and a bit of coarse salt on a warm day!

With just a few simple ingredients and a bit of patience, you can elevate your culinary creations to new heights. Whether you're spreading it on freshly baked bread, incorporating it into your favorite recipes, or simply enjoying it on its own, homemade cultured butter brings a unique flavor and richness that's hard to beat.
Explore the joys of cultured butter by making it in your own kitchen and let your creativity flourish. From sweet to savory, the possibilities are endless when you have a batch of homemade cultured butter at your fingertips.
It would go beautiful with everything we make in our hands-on Artisanal Breads Boot Camp coming up on Saturday, June 8 at 10am.
Learn more about Artisanal Breads Boot Camp

Cultured Butter
Ingredients
- 2 cups heavy cream
- 1/4 cup buttermilk
Instructions
- In a quart jar or container, combine the heavy cream and buttermilk. Stir to combine, cover with cheesecloth, and secure with a jar ring or rubber band. Allow to sit at room temperature (70-75°F) for 24-36 hours, until the cream has thickened to a sour cream-like consistency.
- Transfer the cultured cream to a mixing bowl or the work bowl of a standing mixer. Using a hand mixer or the paddle attachment of a standing mixer, whip the cream until it reaches an airy, soft texture resembling whipped cream.
- Continue mixing until the cream appears gritty and starts to clump. Mix until you can see a mass of fat separating from its liquid.
- Line a mesh sieve with cheesecloth and strain the solids, reserving the liquid (buttermilk) for other culinary uses.
- Gently squeeze the cheesecloth to remove excess moisture from the butter.
- Rinse the butter under cold running water 3 to 4 times, squeezing the cloth each time until the water runs clear.
- You now have cultured butter and buttermilk. Store the buttermilk in the refrigerator for up to 7 days to use in recipes like pancakes, biscuits, or further dairy cultures (like more butter).
- Season the butter to taste with sea salt and shape as desired. Spoon the butter onto a piece of parchment paper and roll it into a log, twisting the paper at both ends to tighten.


