My husband and I hosted Mother's Day brunch at our house last weekend, and although it's a lot of work, I would rather spend quality time with my mom in the comfort of our home rather than a crowded, loud restaurant.
Cooking at home also gives us the creative freedom to serve whatever we like, and because we're both chefs, it’s always a lot of fun coming up with a menu! Several years ago, I made flan for my mom and she couldn't get over how delicious it was, so I decided to make it again for our Mother's Day dessert.

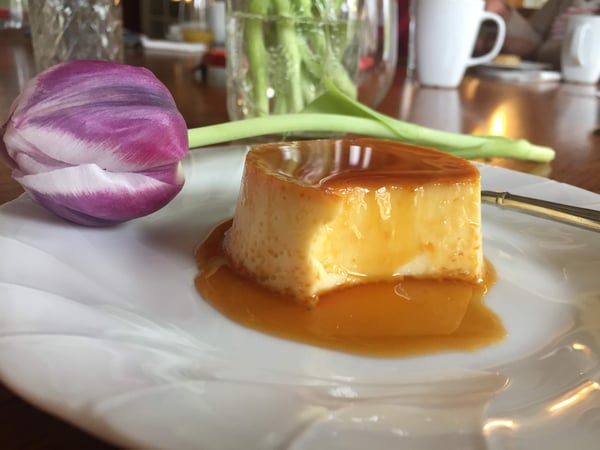
Flan is a baked custard dessert from Spain that falls in the same category as crème brûlée and pot de crème. Flan has a unique twist, though. It has a layer of caramelized sugar on the bottom of the ramekin that then becomes the top when you invert it onto the plate, which then blankets the incredibly smooth and silky custard in a delicious caramel sauce. This dessert also only calls for 5 ingredients, which you most likely already have at home, and it's best made a day in advance. Sounds pretty awesome, doesn't it?
The first part to making flan is to ensure you have ramekins. There are some flan recipes out there that call for a larger pie dish, but I find this version harder to unmold, so I stick to the individual servings.
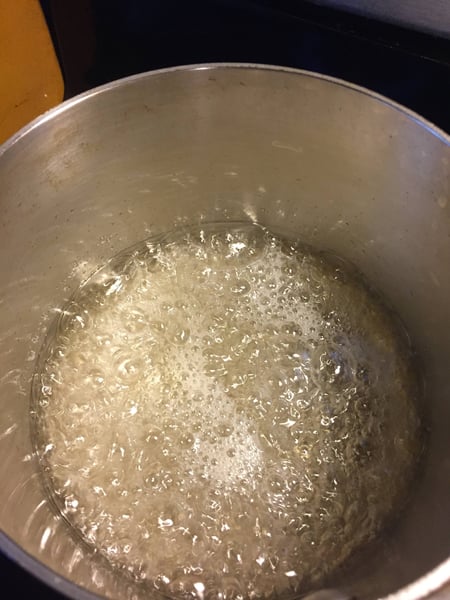
The most intimidating part of the recipe is to successfully caramelize the sugar. Not dark enough, and the caramel isn't flavorful enough. Too dark, and the caramel is bitter. It can be tricky to get the right color, so it's important you stay at the stove and monitor the sugar once it starts to turn amber in color. On a side note, when I was on my culinary internship, I burned so many pots of sugar while trying to make caramel. One was so bad that I had to put it outside so the smoke wouldn't set off the fire alarms! This happened because I walked away and didn't watch my sugar, so don't make that mistake.

As you can see from the pictures, the sugar will start to turn amber in color around the edges of the pan. You can very gently swirl the pan to ensure the sugar is cooking evenly, but be sure to never ever stir the sugar with any type of spoon or spatula. The sugar can very easily crystalize from any impurities that are introduced to the pan, creating hard lumps of sugar that won’t dissolve in your pot. Plus, the sugar is reaching temperatures close to 345°, so keep all utensils and fingers away from the pot.
Once the sugar has reached a dark amber color, pull the pot from the stove and allow the bubbles to subside. This will reveal your beautifully caramelized sugar. A dark amber color (348°) is ideal. It's still sweet but has a tiny hint of bitterness that helps cuts through the sweet custard. It's the perfect marriage! Check out this chart of the stages of sugar from Food52. Pour enough caramel into the bottom of each ramekin so it's about 1/4-inch thick. Allow the caramel to cool completely before pouring in the custard. Tip: To clean the sugar pot, fill it with water and bring to a boil. This will remove any sugar stuck to the insides of the pan.
Now that the sugar is done, you're onto the easy part. Making the custard is pretty straight forward, but two important tips I want to share with you are the tempering and the straining. First, when it's time to add the hot half & half to the egg-sugar mixture, you want to gently raise the temperature of the eggs by slowly ladling in the half and half while whisking to make sure you don't end up with a scrambled mess.
Second, straining through a fine sieve will ensure your custard is as smooth as silk. Even though you did your best to temper the eggs, it's good practice to strain the mixture to ensure there are no bits of cooked egg in the custard. Bonus tip: Strain the custard into a liquid measuring cup with a pouring spout.
Place the custard filled ramekins in a baking dish, and pour in enough hot water to come half way up the sides of the ramekins. The water bath will prevent the delicate custard from scrambling. Note that I place the baking dish in my oven first, and then pour in the water. Less risk of spilling water!
Bake until the custards are just set, remove from the water bath, and refrigerate. It's best to chill the flan overnight, so they are completely cold.
Run a paring knife around the inside rim of the ramekin, turn it upside down on a plate, and gently give the ramekin a few shakes while holding onto the plate. Gently lift up the ramekin to ensure the flan has been released. If not, give it a couple more shakes. Allow any liquefied caramel to drip onto the flan before enjoying.
Not to toot my own horn, but the room went silent when everyone took their first bite. It's seriously that good.
It wouldn't be fair if I didn’t give you a heads up about cleaning the ramekins. There's going to be a layer of hard caramel on the bottom of your ramekins after unmolding, so this is how you clean them. Place the ramekins in a deep pot, fill it with enough water to completely cover them, and bring the water to a boil. Simmer the ramekins for about 10 minutes, remove the pot from the heat and let them soak for about 30 minutes. Or, you can just run the ramekins through the dishwasher a couple of times. Either way works!
Come make flan and other delicious Spanish specialties in our Date Night: Paella Party classes this June. We'll make sure your sugar comes out perfectly, and clean the ramekins so you don't have to!
Flan (Caramel Custard)
Yield: 4 servings
Active time: 30 minutes
Start to finish: 2 hours, 30 minutes
For the custard:
1 1/4 cups half and half
1/2 vanilla bean, split and scraped or 1 teaspoon vanilla bean paste
2 eggs
1 egg yolk
1/2 cup granulated sugar
Pinch sea salt
For the caramel:
2/3 cup granulated sugar
1/4 cup water
1. Preheat the oven to 350º set on the conventional setting, not convection.
2. Set four 4-ounce individual ramekins into a roasting pan with tall sides.
3. Infuse the custard base by heating the half and half and vanilla bean pulp and pod or vanilla bean paste over medium-low heat until barely steaming. Turn off the heat and allow it to steep for 15 minutes.
4. Make the caramel: Combine 2/3 sugar and water in a small heavy saucepan and bring to a boil. Continue to cook without stirring until syrup caramelizes to a deep amber color.
5. Immediately pour the hot caramel carefully into the bottoms of the ramekins. Allow to cool while the custard is prepared.
6. Remove the vanilla bean pod from the cream. Whisk the eggs, yolks, 1/2 cup sugar and salt in a large mixing bowl to combine thoroughly. Stirring gently with a whisk, pour in the warm half and half mixture slowly.
7. Strain through a fine sieve into a liquid measuring cup with a pouring spout.
8. Pour the custard over the caramel in the ramekins, filling to about 1/2-inch from the top.
9. Add very hot water to the roasting pan so the water reaches halfway up the outsides of the ramekins.
10. Bake until the custard is set but still slightly quivering, about 30 minutes.
11. Remove ramekins from roasting pan and chill thoroughly in the refrigerator for at least 1 1/2 hours, but overnight is best.
12. Unmold by running a table or paring knife around the edges of the custard and inverting onto a plate. The caramel will pour out over the custard.
