As the world of soups and sauces is ever so extensive, time has created a million variations and preferential changes to everything anyone may consider correct. Flavors will be ever changing as it should be. Each house has its own flavor based on family recipes, equipment needed, ingredient availability, likes, dislikes and so many more variables. The one area that I feel like should be more consistent is the viscosity of these soups and sauces.
Thickening a liquid is not difficult and more often than not, you are doing it without even trying. There are many ways to thicken. Here are just a few:
- Reduction: Allowing your soup or sauce to simmer/boil, thus evaporating water out of it to concentrate flavors and create a thicker final product with the remaining protein, carbohydrates and fats.
- Absorption: Some soups or sauces will have grains (rice, lentils, quinoa, pastas and more). They will normally be added after the liquid to allow them to cook and take on the flavor of the broth, but as they cook they are absorbing water from the liquid and again therefore thickening the soup or sauce.
- Purees: Many times when you cook a soup or sauce, the vegetables, grains or protein ingredients will cook in a broth. Pureeing these items in a blender after being fully cooked will disperse them throughout the liquid and make a thicker and smooth final product.
- Starches: Depending on the cultural origins of soups and sauces, you will find different starches used to thicken. A few common ones are cornstarch, arrowroot, xanthan gum, agar-agar and potato starch. Each one has it strengths and weaknesses, but most can be combined with just enough water or broth to avoid clumps and then whisked into the soup or sauce and brought to a boil for 1-2 minutes.
- Roux: Last and far from least, roux is one of the most effective thickeners, and it also imparts a bit of its own flavor which depends on how far you cook it. A roux is traditionally equal parts combination of butter and flour, but many people choose to use healthier fats and sometime increase the flour a touch to enhance the thickening potency. It is then whisked into your liquid and needs to boil for 2-5 minutes (depends on amount of liquid being thickened) to fully thicken your product.
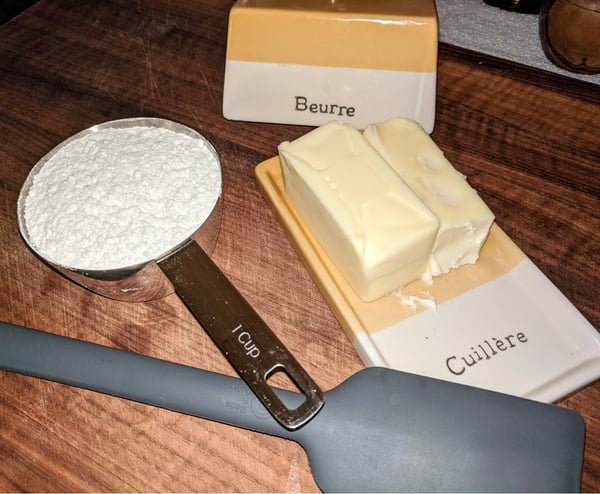

Now that we have covered the spectrum of thickening I would like to zoom in a bit on my personal favorite, roux! Many people don’t even realize they are using a roux to thicken due to it being worked into the recipe in a tricky way. For example, lots of stews will ask you to toss your protein in flour and then have you sear it. This will usually create better browning on your meat. You will then continue with sautéing your veggies and adding your liquid, but what is not realized is, the flour that had stuck to the bottom of your pan during the searing (referred to as fond) is actually going to be lifted off the bottom when liquid is added and thus be your roux for thickening.
The best part about roux is its ability to bring its own flavor to the soup or sauce and thicken so effectively. Roux works on a color scale which will tell you its thickening power and its amount of flavor depending on how much you cook it prior to adding the liquid.
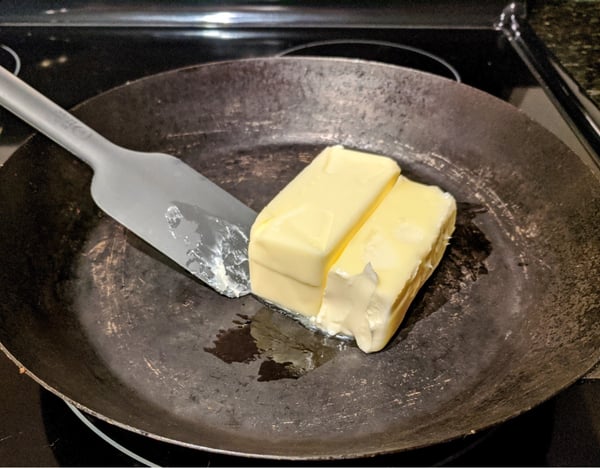
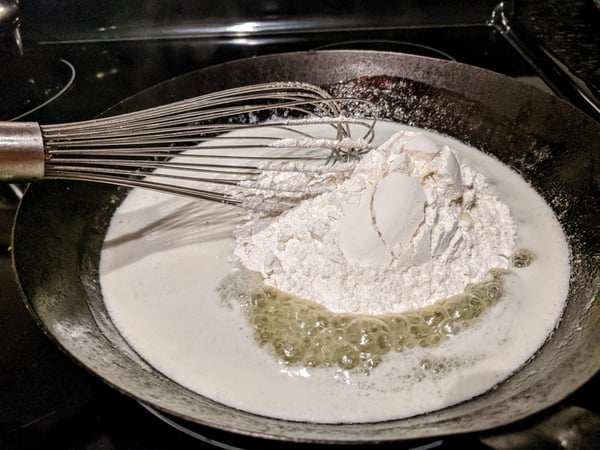
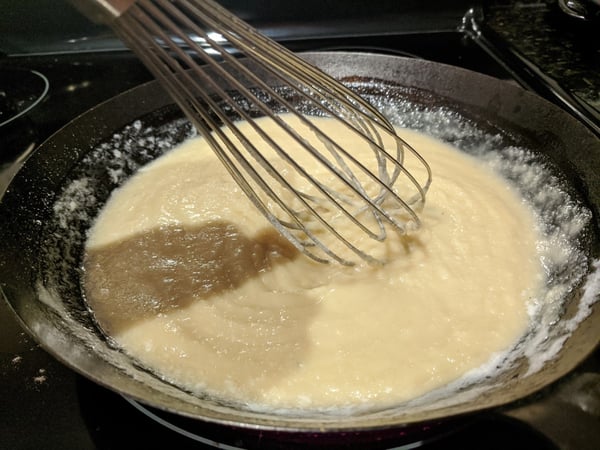
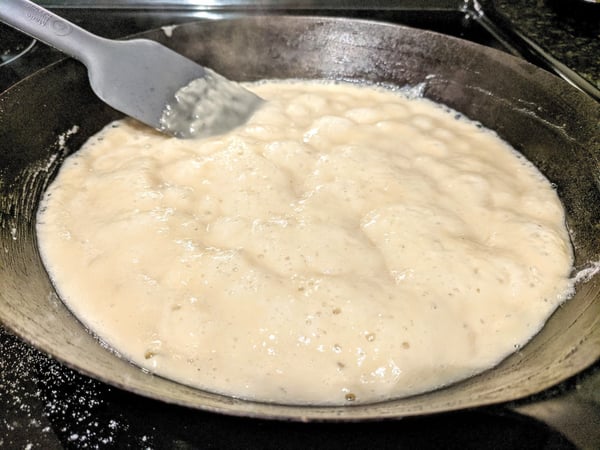
The usual benchmarks you will see in recipes are as follows:
- White Roux: Simply butter melted and flour whisked in. This should still be cooked slightly but only enough to get the flour cooked a little bit. It's usually only brought to a boil (as butter has water in it) for a minute and liquid is added off heat to stop the cooking. This roux will be primarily for thickening the liquid but very little flavor is gained. This type of roux is commonly used for Sawmill gravies or Béchamel sauces.
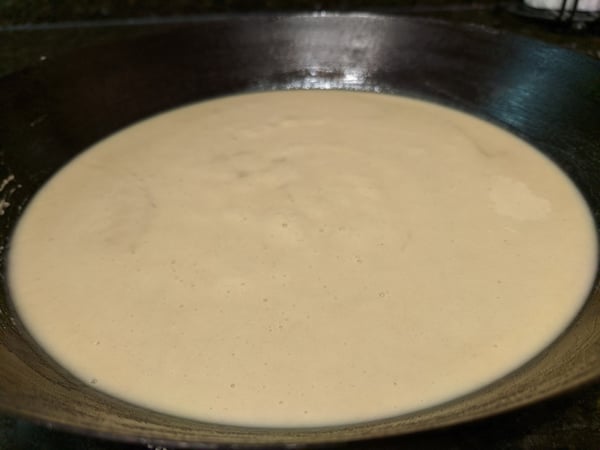
- Blond Roux: Just as the name says, this is white roux that has cooked slightly more and begins to take on the smell of white bread. There should only be the slightest light khaki color developed and the flavor is super subtle. This roux is used for Veloute sauces, bold cheese Moray sauces (continuance of the Béchamel) or thickening clear broth soups.
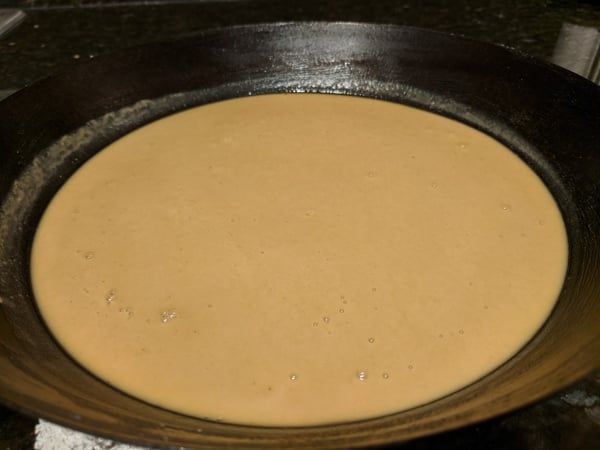
- Tan or Light Brown Roux: This roux results when you continue cooking blond roux until it begins to take on a tan or light brown color and smells like lightly toasted bread. The rich flavor will come through a little more, so this roux is used for dishes like your Thanksgiving turkey gravy or beef gravy to go with a bold protein like steak.
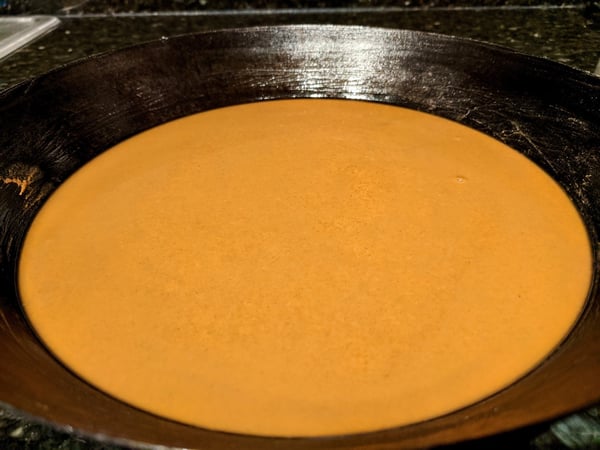
- Brown Roux: This is the first stage of roux that showcases itself a bit. Cooking a roux to a brown color will start to smell like fresh baked artisan bread and it is going to bring out a nuttiness and depth of flavor that will enhance the flavor of your liquid. Brown roux only gets more intense as you cook it and some consider a “dark brown roux” the next step, but I feel that once you hit brown roux it is similar enough to classify them as one group. This roux is commonly used in stews or braised dishes as they tend to have bolder flavors.
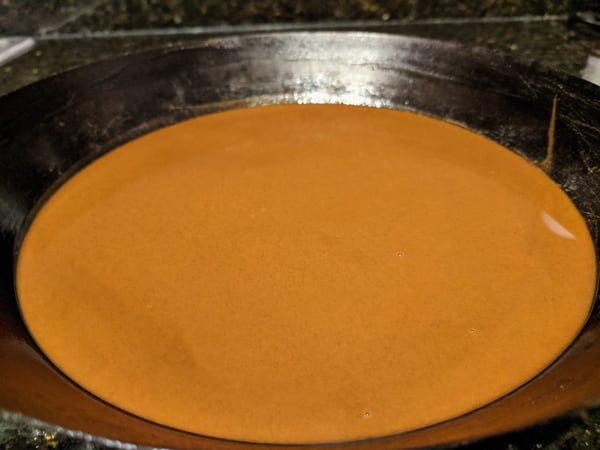
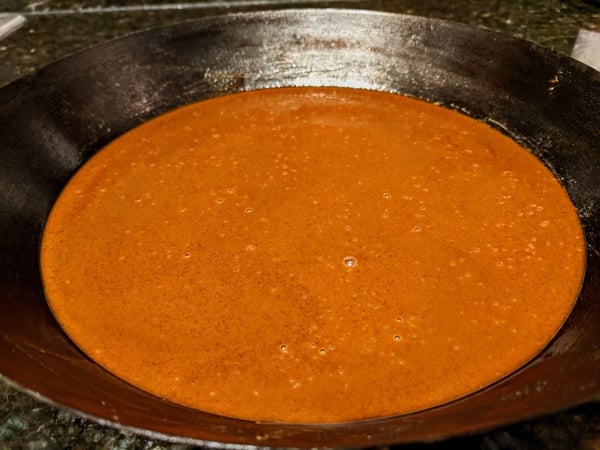
- Black Roux: The infamous black roux is strictly used in Cajun and Creole cooking. In fact, it is a highly debated subject as much of the culinary community feels that it is simply a dark brown roux. In my opinion, there is a vast difference in flavor that until you have had a soup thickened with a true black roux, you will not understand. After you achieve a dark brown roux stage, reduce the heat to low and continue cooking it while continuously stirring. The roux does have a high risk of burning at this point so you will need to be attentive and know that the window of a true black roux and a burnt roux is approximately 45 seconds. As it is used most often in gumbo or jambalaya, you should always be ready with your prepped meat and veggies. When you begin to smell a deep toasted bread smell, the roux should start taking on a reddish hue. The second you smell a scent like popcorn is when you want to add your meat. It's just barely starting to burn and achieve a subtle smokiness. This will bubble and pop like crazy and lower the temperature of your roux substantially, but continue cooking for about one minute. You should start to smell the meat cooking and that's the signal to add your veggies. The vegetables will release water and plummet the temperature, essentially stopping the cooking process.
Now that you have the basics on roux, here a few tips to help in your future endeavors.
1. Any time you are adding liquid to your roux remove it from the heat.
2. It is best to have cold liquid and hot roux, or cold roux and hot liquid.
3. Add your liquid slowly at first and whisk rapidly to avoid clumps.
4. The darker the roux, the weaker the thickening power so you may need to add a tablespoon or two of fresh flour to your darker roux.
5. If you want to make a big batch of roux and freeze it in an ice cube tray it will hold for up to a year, and you can throw it into any soup or sauce you need to tighten up!
Although I wouldn’t recommend diving straight into a black roux for your first time making it, I do encourage you to try working with roux. It is astounding how much flavor and texture can be achieved using this classic technique and after you get a handle on the classic white through brown roux, give the infamous black roux a try. You'll shock your friends and family with a flavor experience that is hard to come by outside of New Orleans!
To learn how to master roux hands-on, don't miss The Chopping Block's Bayou Bash class coming up on:
You'll make a festive menu full of cooking techniques:
- Muffuletta Salad with Olives, Pepper, Salami and Provolone
- Crispy Cornmeal-Fried Oysters with Remoulade
- Gumbo with Crawfish and Andouille Sausage
- Bananas Foster Bread Pudding with Vanilla Bean Ice Cream


