Well, Summer certainly took its sweet old time getting here this year, but since it arrived it’s been hot-hot-HOT! When it comes to cooking, for many of us that means trying to use our stoves and ovens only when necessary. As far as I’m concerned, dessert doesn’t necessarily qualify as “necessary”, and here I’d like to share one of my favorite “no bake-no cook” go-to bites. I like little bites for dessert, especially when it’s hot outside. It's just a little something to top off your meal, but without having to go all-in on a piece of pie or cake.
To be clear, I love making tarts – chocolate tarts, lemon tarts, even savory tarts. But one of my favorite tarts of all time is a beautiful fruit tart, with all the glossy fruit arranged “just so”. With Summer being the best season of all for fresh fruit, that’s just where I just naturally aim toward. However, I don’t always need a formal fruit tart. Sometimes a more casual presentation will be perfect, and at those time these little fruit tart bites are what I go for. And there’s no need to turn on that stove or oven at all!
These fruit tart bites have a graham cracker crust, are filled with a mascarpone cheese and whipping cream mixture, and are topped with your favorite “mini” summer fruits, like raspberries, blueberries or sliced strawberries. This recipe will make 16 bites – feel free to increase as you wish!
For equipment, you’ll need a mini muffin tin and a hand or stand mixer. I also use a food processor, but you can easily make do without it if you don’t have one or prefer not to use it.
For the crust, I like starting with whole graham crackers. You can certainly buy graham cracker crumbs, but since I’m putting it all in the food processor to mix anyway, I just get the whole ones. Besides, my husband loves graham crackers, so having some of the box left over is not a bad thing in our household!
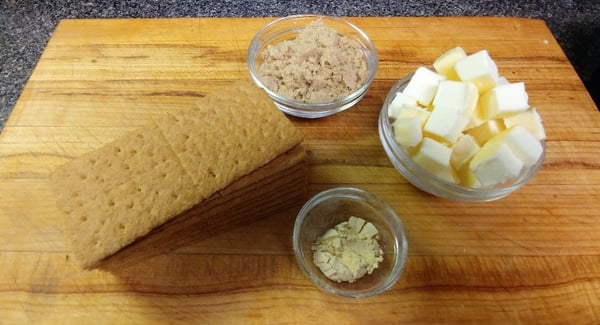
I use 9 graham crackers (5 oz), 2 oz of brown sugar, and – this time! – ½ tsp of ginger. You can use whatever spice suits your palate – cinnamon is a good one, too. I just like the idea of ginger with the fresh fruit. You’ll also need 7 Tbsp of unsalted butter, cut up into small pieces and at room temperature. This is a bit more butter than most graham cracker crusts will call for, but I have found that this works for me when I’m not baking the crust. The extra bit of butter keeps the crust from falling apart. And you’ll know the butter is at the right temperature when you can easily “pinch” the butter between your fingers. Take a look at this little video:
You can see that when the butter is soft enough, your food processor will blend it all together for you without having to melt it. No stove! Nice, right?
As I mention in the video, you can definitely make this without using a food processor. Just put the graham crackers in a Ziploc bag and run over the bag with a rolling pin until you’re left with fine crumbs. Then mix the crumbs with the sugar and ginger in a bowl and add your melted butter. (Yes, you will have to melt the butter.)
Now you can fill that mini muffin pan!
As you can see, I like to use my little portion scoop – it holds about 2 teaspoons. However, if you don’t have one just measure out about 2 teaspoons of the mixture for the first tart so you have an idea of how much you’ll actually need. Then you might feel comfortable estimating the rest of them (or you can continue measuring, if that’s more your comfort zone). Also note here that you need to make this crust kind of thick so they don’t fall apart when they’re done and you remove them from the pan.
These need to chill; remember, it’s butter that’s binding everything together and we are not baking these. An hour in the fridge or 20-30 minutes in the freezer will do the trick. I popped this batch in the freezer.
While the crusts are chilling, you can make your filling. Typically a fruit tart would be filled with a pastry cream or fruit curd, but since making both of these require a hot stove, I take a different route for these little delights. These are filled with a fortified whipped cream, meaning whipped cream that is made sturdier with the addition of something else. In this case, the “something else” is mascarpone cheese. I made a big batch today, because I wanted to have enough to show you alternate ways of filling the crusts. You can easily cut this in half and you will still have some left over. It will keep in the fridge – you can always use it to frost cupcakes or make more of these bites!
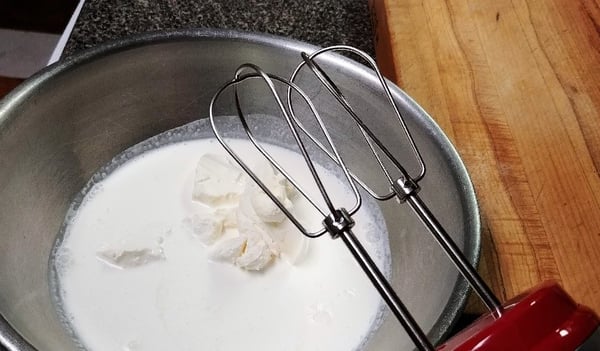
While you can use cream cheese, I like mascarpone cheese (Italian cream cheese) because it has a little bit of a “tang” that cream cheese does not, and it’s silkier in texture, so it blends super-easily with the whipping cream. But feel free to substitute cream cheese if that’s more to your liking or simply easier to find. I weighed out 8 oz of mascarpone cheese, 3 oz of brown sugar and 2 cups of whipping cream in a deep bowl. If you want to see some of those beautifully fragrant vanilla bean seeds in your filling, you can add some vanilla bean paste, as well. I thought I had some of my favorite Nielsen Massey Vanilla Bean Paste, but it seems I ran out. I do love those seeds though!
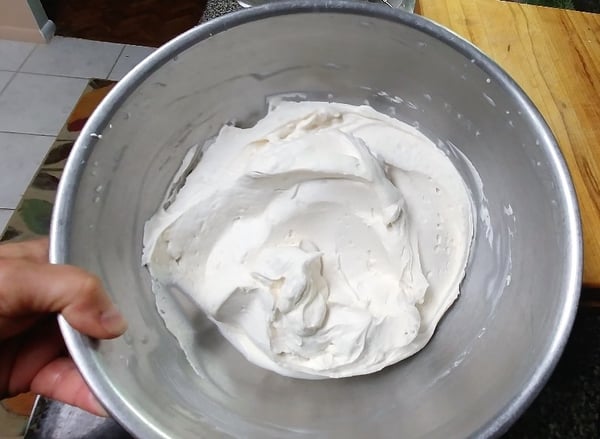
Whip the filling up with your mixer (stand or hand) until your filling will be creamy and light - you don’t want to see any liquid, but you don’t want to overmix it either. If I’m using a hand mixer as I did today, I like to put my bowl in the sink as I mix so the spattered bits don’t end up all over my kitchen!
Now set yourself up for however you choose to put the filling into the crusts.
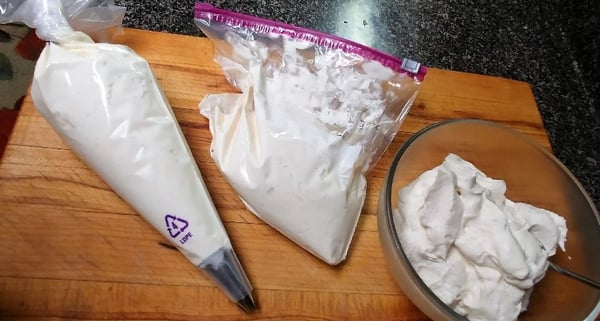
Here you can see that I set up three ways to fill: using a piping bag and tip, using a Ziploc bag and clipping the corner, and just using a spoon to scoop filling out of a bowl. Once you’re set up, put your filling in the fridge for at least 10 minutes (longer is fine) to settle just a bit. By then your crusts will be ready to come out of the freezer/fridge.
I find that setting the crusts on a quick-release surface like waxed paper, parchment or a Silpat silicone mat helps to move them later. You will be refrigerating them again and as that butter hardens up again, they can easily stick to a plate or tray.
Now I’ve got a little video to show you how to fill the crusts. Really, there’s not grand scheme or magic to this, just go with whatever way makes you comfortable!
Once the crusts are filled, simply top them with the fruit of your choice. Today I used raspberries and blueberries. Unlike with a fancier, more formal fruit tart, I did not glaze the fruit with any sort of jelly. I kind of like the rustic nature of these, so unglazed seems the way to go. And besides, if I was going to glaze them, I’d have to turn on my stove to melt the jelly and we’re not using the stove – nope, not today!
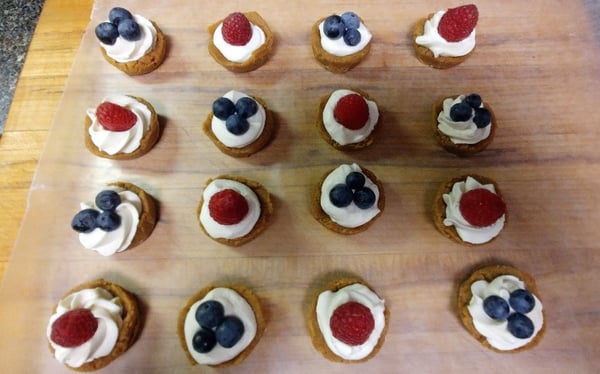
Set your filled and topped fruit tart bites in the fridge until you’re ready to serve them. This will get the crusts nice and firm, as that butter has softened in the time they’ve been out. Also, especially in hot weather, what dessert doesn’t taste better when it’s cold?
When you’re ready to serve them up, put them on a nice platter or cake stand and you have a nice light dessert bite ready to enjoy on a hot Summer day!

The Chopping Block offers a number of classes that focus on Summer dessert specialties! In July, think about our Blue Ribbon Baking and Summer Pie & Tart Boot Camp. We even have a Gluten-Free Desserts class in August. And don’t find yourself without that Nielsen Massey Vanilla Bean Paste like I did – that and nearly everything else at The Chopping Block is 20% off during the month of July!


