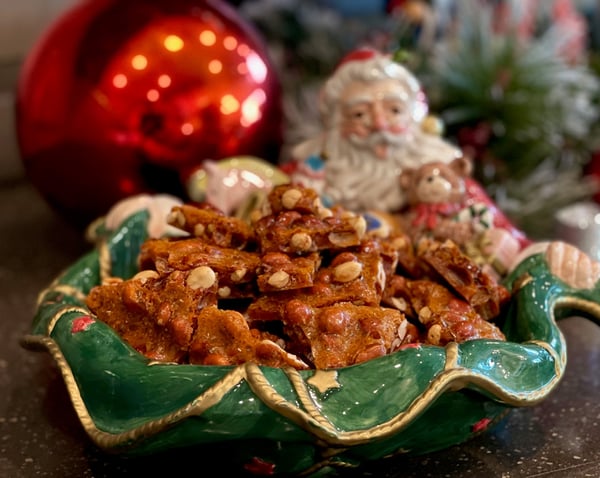
I love peanuts and peanut-y dishes: Kung Pow Chicken, peanut sauce, peanut butter cups, peanut butter cookies, peanut butter pie and of course, peanut brittle. I always loved the taste of peanut brittle but sometimes it has a tendency to stick to your teeth or be really hard, and that I don’t love.
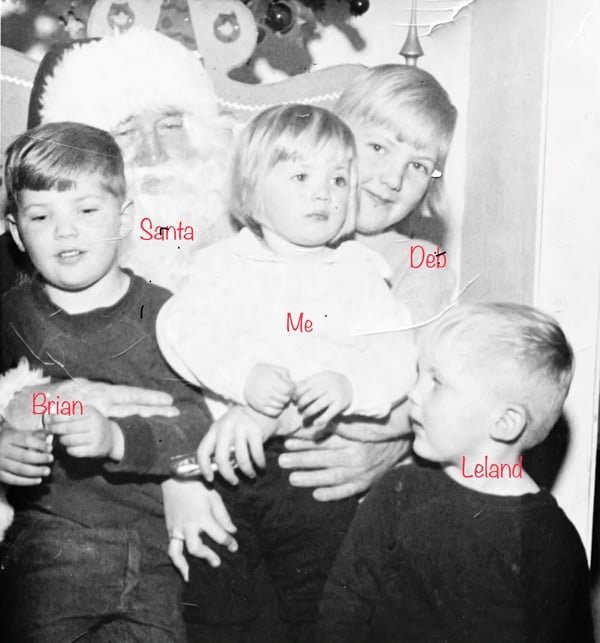
It’s my sister’s brittle that transformed the peanut brittle experience for me. My sister is an amazing baker and she goes all out for Christmas, beautifully decorated and delicious sugar cookies, Russian tea cakes, fudge, almond bark, spritz cookies (my favorite, is there some in the mail sis?) and of course peanut brittle. This brittle recipe is so crunchy, light as air, the candy part just dissolves in the mouth, while the peanuts are toasty and crunchy. If this were entered into the Iowa State Fair competition, it would absolutely win a blue ribbon!

I would rather be with my sister and eating her peanut brittle now but being able making her recipe feels a bit nostalgic. Although we can’t be together, I can get a taste of home as the smell of peanut brittle is wafting through my kitchen. I hope you find some of the season's joy in this recipe too.

My Sister's Peanut Brittle
Scroll down for a printable version of this recipe
Yield: About a pound
Prep Time: 5 minutes
Cook Time: 15 to 25 minutes
1 1/2 cups granulated sugar
3/4 cup light corn syrup
1/2 cup water
1/4 teaspoon salt
12 ounces red skinned peanuts
3/4 Tablespoon butter
1 teaspoon vanilla
1 1/2 teaspoons baking soda
*A candy thermometer is critical to consistent results. I recommend you have one before attempting this recipe. You can email lincoln@thechoppingblock.com to place your order for curbside pickup from our Lincoln Square store or order easily order one online from many sources.
Step 1: Gather ingredients and prepare
Have all your ingredients measured out and ready to go before you begin this recipe. You need to be prepared to move quickly when making candy. It can go from perfect to burnt in an instant so be ready to go with ingredients and equipment before you get started.
Have a sheet pan ready to pour the hot peanut brittle mixture onto for cooling. Line your sheet pan with a Silpat baking mat or lightly coat the pan with neutral oil like grapeseed.
One little cleanup tip I’ll share: keep a small 3 quart sauce pan with hot water in it beside the pot you cook the brittle in. I use this pan to place my spoon and candy thermometer in when the brittle is done cooking. It provides a place for these very sticky, messy and extremely hot items to land. It will dissolve the sugar off of your thermometer and spoon. When you have emptied the peanut brittle out onto the prepared sheet pan, you can dump this same hot water into the you cooked the brittle in. It makes for a very quick cleanup up of a very sticky pot!
Step 2: Bring sugars to soft ball stage
Place 1 1/2 cups of sugar in a 5 to 8-quart heavy duty pot. I use an 8-quart stock pot myself; it seems to cook perfectly in this size. In a large pot you have less chance of boil over, it’s amazing how much this recipe expands when you add the baking soda. To the sugar, add 3/4 cup of light corn syrup and 1/2 cup of water and 1/4 teaspoon salt.
*My sister’s recipe calls for 1/4 teaspoon of salt. I personally find this is enough if I use salted peanuts, but if I use unsalted peanuts, I like 2 teaspoons of salt in my brittle. I just think salt is so good with caramel and peanuts! Stir the ingredients until well combined.
Put a candy thermometer in the pot and cook over a moderate heat until the thermometer reaches 240 degrees or soft ball stage. The timing will vary widely depending on your stove and circumference of your pot but a good estimate is 10 to 15 minutes.
*The wider the pot, the faster the water will evaporate and come to softball stage. That isn’t necessarily a pro or a con, just something to be aware of.
Don’t stir this mixture unless you have too. If you I see it cooking a little unevenly, perhaps it is browning a little bit in one area but not all over, just give it a stir to even it out but then just leave it alone. You should not see a lot of browning during this period of the cooking but more of a very light golden color. If it seems like it is browning too much, turn the heat down and keep a close eye on it and stir as needed.
Step 3: Add the peanuts and caramelize
When the sugars reach 240 degrees add 12 ounces of red skin peanuts. At this point, you will stir regularly, keeping your eye on it until the thermometer reaches 295 degrees.
Turn off the heat and immediately add vanilla, butter and baking soda.
This will bubble up a lot, so don’t worry - that is normal. Mix as quick as you can and pour the mixture on the prepared sheet pan. You may want to get some help here. The pot is pretty heavy and the mixture is dangerously hot, don’t get yourself to this point and realize you can’t manage this on your own. If you don’t have a personal assistant available, the other option is to use a ladle out the brittle onto the sheet pan. Get that sheet pan close to the pot so you don’t end up with candy all over you stove and counter! Work quickly because it sets quickly.
*I have made this recipe literally hundreds of times and one of the biggest variables is how caramelized the brittle gets. I like to push the brittle to a very caramelized state, almost on the verge of burning. I think that can be quite a frightening proposal if you have never made caramel/candy. I would suggest stopping as soon at the thermometer reaches 295 if you are new to making candy. If you start to feel more confident in years to come you may want to try pushing the temperature a degree or two beyond 295. Its amazing but 2 degrees really is a lot once you get to 295 degrees.
Step 4: Cool and crack
Let the peanut brittle set at room temperature until completely cool, about 2 hours. You can crack it simply by picking it up off the sheet pan and bending it a little or cracking it with a heavy utensil.
Feel free to make this recipe your own by changing up the nuts, adding some heat like chili flakes, herbs like rosemary or exotically spice it up with some curry powder. If adding any additional seasonings, add those when you add the vanilla at the end.
I hope you enjoy this recipe and that it becomes a part of your own family’s holiday tradition. If you are looking for more holiday ideas check out our upcoming virtual classes:
- Virtual Family Fondue Party Saturday, December 26 4pm CST
- Virtual New Year's Eve Retro Appetizer Party Tuesday, December 29 6pm CST
- Virtual New Year's Eve Cook Along French Steakhouse Workshop Wednesday, December 30 6pm CST
- Virtual Noon Year's Eve Party Food Thursday, December 31 11am CST
- Virtual New Year's Eve Date Night Surf and Turf Thursday, December 31 6pm CST
Peanut Brittle
Ingredients
- 1 1/2 cups granulated sugar
- 3/4 cup light corn syrup
- 1/2 cup water
- 1/4 teaspoon salt
- 12 ounces red skinned peanuts
- 3/4 Tablespoon butter
- 1 teaspoon vanilla
- 1 1/2 teaspoons baking soda
Instructions
- Place 1 ½ cups of sugar in a 5 to 8-quart heavy duty pot. I use an 8-quart stock pot myself; it seems to cook perfectly in this size. In a large pot you have less chance of boil over, it’s amazing how much this recipe expands when you add the baking soda. To the sugar add ¾ cup of light corn syrup and ½ cup of water and ¼ teaspoon salt.
- Put a thermometer in the pot and cook over a moderate heat until the thermometer reaches 240 degrees or soft ball stage. The timing will vary widely depending on your stove and circumference of your pot but a good estimate is 10 to 15 minutes.
- When the sugars reach 240 degrees add 12 ounces of red skin peanuts. At this point you will stir regularly, keeping your eye on it until the thermometer reaches 295 degrees.
- Turn off the heat and immediately add vanilla, butter and baking soda.
- This will bubble up a LOT, so don’t worry that is normal. Mix as quick as you can and pour the mixture on the prepared sheet pan. Work quickly because it sets quickly.
- Let the peanut brittle set at room temperature until completely cool, about 2 hours. You can crack it simply by picking it up off the sheet pan and bending it a little or cracking it with a heavy utensil.
