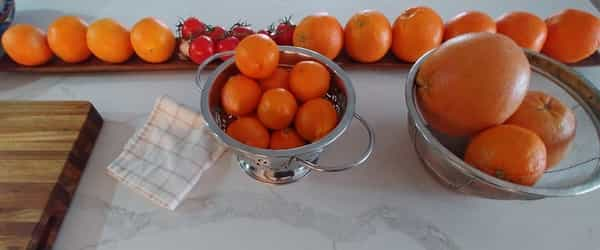
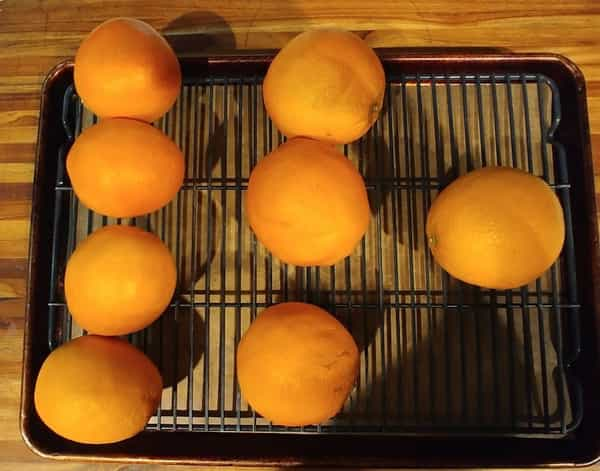
“Citrus Season” is considered to be December through April, so we are smack in the midst of it right now – and does my kitchen ever show it! We have everything from Clementines and Ruby Red Grapefruit for the mornings to an array of different oranges to snack on or juice.

I have been reading about dehydrating citrus slices to make “chips”. The chips may be used as snacks or added to hot tea or while cooking other dishes to amplify citrus flavors. I decided to give the process a try with oranges, although this may be done with other citrus as well, such as lemons or limes (times may vary with size of fruit). Much of what I read called for using a food dehydrator, and some talked about using an air fryer. I don’t own either, so going down the “very low and slow” oven route was going to be my best option. As you might imagine, there were different temperatures with different timeframes, but I think I finally found the combination that works best for me – and I’d like to share it with you. Yes, the process takes several hours, but it’s only about 10 to 15 minutes of prep time, and your oven does the rest. So please don’t let the timeframe keep you from trying this out!
There are a few things I learned along the way which I’d like to pass on.
First, use seedless oranges! This will accomplish a couple of things. Seedless oranges will allow you to make these very thin slices much more easily because you won’t be hitting seeds as you do so. Also, you won’t have to pick the seeds out of the slices, which will save you an entire step of preparation as well as leaving the flesh of the slice much more intact. I used navel oranges, cara cara oranges and blood oranges so the finished crisps would be a variety of colors.

Next, understand the components of the orange – and how they affect flavors. Remember how, when you’ve been instructed to zest a piece of citrus, you’re always told to avoid digging into the white pith, just under that delicious outer zest layer? That’s because the white pith is bitter – and who wants bitter flavors in their zest? Well here, since you’ll be dehydrating the entire slice, it will include the pith. Whatever bitter flavor the pith may impart might not be an issue if you’re adding these slices to a savory dish, like a braise or tagine. But if you’re also planning to snack on the chips, I realized that bitterness needed to be toned down just a little. I did this by adding sugar around the pith and zest of the oranges. While the result still had bitter undertones (which my taste buds don’t mind!), the sweetness of the sugar offset it just enough to enjoy the chip so much more than if it had been left plain. In the end, I made both!
Finally, remember that the thicker the slices, the longer the drying time. I made the slices quite thin (about 1/8”) to keep the drying time on the shorter side. You may certainly slice them thicker, but you will have to adjust your drying time accordingly. Use the sharpest knife you have. Do not use a serrated knife because that will only make for jagged cuts through the tender flesh of the fruit.
Let’s get started by making sure your oven is preheated to bake at 175⁰ F. You may use either a conventional or convection setting. I used a conventional oven because not everyone has access to convection. At this low temperature, timing should not change substantially.
Make sure your oranges are washed and dried.
Line two rimmed sheet pans with parchment and place a wire rack in each. I used one sheet pan for sugared slices and one for plain slices. If you’re going to make some sugared chips, pour about a cup of sugar (you can always add more) into a shallow bowl.
Now slice the top off an orange (a cross-wise cut), far enough down that you can see a full round of flesh.
Place your sheet pans in the oven and set your timer for 2 hours. After 2 hours, rotate the sheet pans (turning them front-to-back AND switching them up & down), and set your timer for 1 hour more.
Take the pans out of the oven to see how they are coming along. The chips should have shrunk, and they will be dry and inflexible at the edges. The flesh itself should be dried out, but still pliable, perhaps a bit tacky to the touch, but not wet. The colors should remain vibrant; if they start to turn brown or lose color, they are probably verging on overdone, so do not put them back in the oven. They will still taste great – they’ll just be a lot crunchier! If some seem done and some are not, remove those that are to a separate rack to cool completely.
I have made these a few times now and sometimes they were done at this 3-hour mark, but sometimes they needed to go a bit longer. If you need to put them back in the oven, do so for only 30-minute intervals and check on them. You can let them cool on the same racks they were baked on. As they cool, the outsides will become more crisp and the inside flesh will firm up a bit.
Remove the chips from the racks when they have cooled completely. If they stick to the racks, you can use a thin spatula (such as a fish spatula) to loosen them.
You can store them in any airtight container and away from direct sunlight for about a month. I like to store them in a glass jar to show off how pretty they are!
Orange Crisps
Scroll down for a printable version of this recipe
Note: If you use either larger or smaller citrus, you will likely need to adjust the baking time accordingly.
Yields: 25-30 orange slices
Prep time:15 minutes
Cook time: 3-4 hours
4-5 assorted oranges, washed and dried
1 cup of sugar (more, as needed), if sugaring the zest and pith
- Preheat oven to 175⁰ degrees F.
- Line two rimmed sheet pans with parchment and insert a wire rack into each. Pour the sugar into a shallow bowl.
- Slice the top off an orange, cross-wise, to reveal a full circle of flesh. Slice the orange into 1/8” rounds. Repeat for all oranges, yielding as many slices as will fit into your sheet pans.
- If sugaring some (or all) of the slices, simply dip and roll the edges of the slices vertically in the sugar up to the where the white pith meets the flesh of the fruit.
- Arrange the slices on the sheet pans without touching one another. I like to use one sheet pan for sugared slices and one sheet pan for plain slices.
- Place sheet pans in oven for 2 hours.
- Rotate the sheet pans (turning them front-to-back AND switching them up & down) and bake for 1 hour more.
- Remove pans from the oven to check progress. The chips should have shrunk, and they will be dry and inflexible the edges. The flesh itself should be dried out, but still pliable, perhaps a bit tacky to the touch, but not wet. The colors should remain vibrant; if they start to turn brown or lose color, they are probably verging on overdone, so do not put them back in the oven. (They will still taste great – they’ll just be a lot crunchier!) If some seem done and some are not, remove those that are to a separate rack to cool completely.
- Store in an airtight container away from direct sunlight for up to a month.
Orange Crisps
Ingredients
- 4-5 assorted oranges, washed and dried
- 1 cup of sugar (more, as needed), if sugaring the zest and pith
Instructions
- Preheat oven to 175⁰ degrees F.
- Line two rimmed sheet pans with parchment and insert a wire rack into each. Pour the sugar into a shallow bowl.
- Slice the top off an orange, cross-wise, to reveal a full circle of flesh. Slice the orange into 1/8” rounds. Repeat for all oranges, yielding as many slices as will fit into your sheet pans.
- If sugaring some (or all) of the slices, simply dip and roll the edges of the slices vertically in the sugar up to the where the white pith meets the flesh of the fruit.
- Arrange the slices on the sheet pans without touching one another. I like to use one sheet pan for sugared slices and one sheet pan for plain slices.
- Place sheet pans in oven for 2 hours.
- Rotate the sheet pans (turning them front-to-back AND switching them up & down) and bake for 1 hour more.
- Remove pans from the oven to check progress. The chips should have shrunk, and they will be dry and inflexible the edges. The flesh itself should be dried out, but still pliable, perhaps a bit tacky to the touch, but not wet. The colors should remain vibrant; if they start to turn brown or lose color, they are probably verging on overdone, so do not put them back in the oven. (They will still taste great – they’ll just be a lot crunchier!) If some seem done and some are not, remove those that are to a separate rack to cool completely.
- Store in an airtight container away from direct sunlight for up to a month.
