Caramel apples have come a long way since I was a kid. Back then, caramel apples were for Halloween and nothing else.


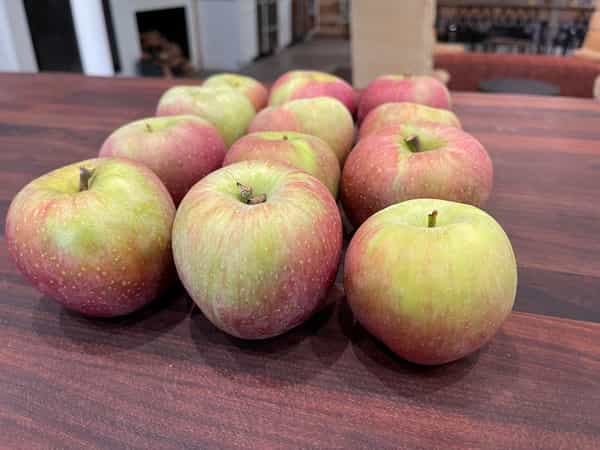
If you want to make caramel apples when fresh picked apples aren’t available, the variety you buy at the grocery store matters. When you are buying apples in the grocery store, Honey Crisp or Granny Smith apples will offer the most crispness. Understand apples can keep for many, many months in the right conditions and the apples you are buying at the grocery store in February were likely picked in the fall… that doesn’t mean they are bad it just means they are not at their peak. Stick with the varieties with the most crispness.
The other reason to seek a farm fresh apple is that they have not been waxed. The apples in the grocery store generally have a very thin edible wax on them, which helps to preserve them. This wax interferes with the caramel sticking to the apples and requires some effort to remove. I really hate spending time on this avoidable step, so I just buy farm fresh and simply wash them in warm water.
Caramel Apples
Yield: 12 apples
Prep time: 30 minutes
Cook time: 30 minutes
Inactive time: 24 hours
12 granny smith or honey crisp apples
3 cups granulated sugar
2 Tablespoons light corn syrup
1/4 cup water
3/4 cup heavy cream
1 tablespoon vanilla
1 teaspoon kosher salt
Optional coatings:
Mini M&M’s
Mini marshmallows
Big flake sea salt
Chopped nuts
Toasted coconut
Chocolate chips
Equipment:
Popsicle sticks or heavy duty skewers
Step 1: Prepare the apples
If using farm fresh apples, simply wash the apples with warm water and dry them thoroughly. Put the cleaned apples in the refrigerator and chill them completely, at least 24 hours. The colder the apple, the better the caramel sticks to the apple.
Have all ingredients measured and ready to make the caramel. Plan to stand by the stove for the whole process, once caramel starts to brown, the process goes very fast. You won't have time to go measure your heavy cream or vanilla… you need everything ready to go when you start.
Once your caramel reaches 340 degrees, it should begin to brown. The ideal temperature is 350 degrees, you may end up a little over or under and that is okay, but only by a few degrees. Over cooking caramel can be problematic as it can get too hard or of course burn. Undercooking doesn’t provide a deep caramel taste. Once the caramel reaches 350 degrees, stir in the heavy cream. This will really bubble up which is why we need a bigger pan so there is room for this. Once you add the cream you will see the sugar seize up into a ball. Don’t worry, this is normal… keep stirring and that lump of sugar will turn into a beautiful caramel in just a few minutes. Lastly, add salt and vanilla and combine.
Step 3: Dip the apples
While the caramel is cooling a little, go get the apples out of the refrigerator. Dry them off once more and stick a popsicle stick or heavy-duty skewer into the spot where the stem was. Stick it in about a 1/3 of the way into the apple so it is stable and secure. Place the apples on a Silpat or parchment-lined sheet pan.
Pour caramel into your measuring cup or Bain Marie for dipping apples, the caramel will need to cool for a few minutes before dipping for it to stick properly. This is a perfect time to get your coatings ready if you are using them. Place your toppings into shallow bowls or plates and line them up close to your dipping station.
Dip each apple into the caramel. You can put as much of the apple or as little into the caramel as you like. Some people like to see some apple peaking out, others want maximum caramel coverage; it is up to you. Let the excess caramel drip off the apple and then invert the apple for a few seconds to give it a little more time to cool and to distribute the caramel better. Once you have dipped the apple in caramel and let it cool slightly, you can dredge in the toppings. Again, you can do a light sprinkling like I did with my sea salt, you can dip the end or dredge the entire apple into your topping of choice, totally up to you.
After dipping and coating, place the apple on the lined sheet pan and refrigerate to set the caramel and to keep the apples fresh until you eat them.
Want to learn other ways to incorporate apples into your cooking this fall? Join us for one of these upcoming classes:
- Hands-On Autumn Apple Feast on the Patio Saturday, October 28 6pm featuring an apple-forward menu Just 1 spot left!
- Virtual Fall Baking Workshop Sunday, October 29 11am CST featuring Apple Fritters
- Thanksgiving Crash Course Demonstration Friday, November 3 10am featuring our famous Apple Pie
- Hands-On Fireside Feast Saturday, November 4 6pm featuring Kale and Shaved Brussels Sprouts Salad with Apples and Hazelnuts
- Hands-On Fall Dinner Party Saturday, November 18 6pm featuring Autumn Apple-Walnut Cake
And of course, if you'd like to pre-order one of our famous Apple Pies or classic Pumpkin Pies, our chefs will be preparing them for Thanksgiving.
Caramel Apples
Ingredients
- 12 granny smith or honey crisp apples
- 3 cups granulated sugar
- 2 Tablespoons light corn syrup
- 1/4 cup water
- 3/4 cup heavy cream
- 1 tablespoon vanilla
- 1 teaspoon kosher salt
- Mini M&M’s
- Mini marshmallows
- Big flake sea salt
- Chopped nuts
- Toasted coconut
- Chocolate chips
- Popsicle sticks or heavy duty skewers
Instructions
- If using farm fresh apples, wash the apples with warm water and dry them thoroughly. Put the cleaned apples in the refrigerator and chill them completely, at least 24 hours.
- In a 2 1/2 to 3-quart heavy gauge saucepan, place sugar, water and corn syrup. Put the candy thermometer into the pan and turn the heat on to medium high. Once the sugar mixture starts to heat up, stir the mixture so that it is evenly combined.
- After that initial stir to combine the ingredients, wipe the insides of the pan down with a wet pastry brush and then refrain from stirring until the caramel is almost done.
- Once the caramel reaches 350 degrees, stir in the heavy cream. Once you add the cream you will see the sugar seize up into a ball. Keep stirring and that lump of sugar will turn into a beautiful caramel in just a few minutes.
- Add salt and vanilla and combine.
- While the caramel is cooling, get the apples out of the refrigerator. Dry them off once more and stick a popsicle stick or heavy-duty skewer into the spot where the stem was. Stick it in about a 1/3 of the way into the apple so it is stable and secure. Place the apples on a Silpat or parchment-lined sheet pan.
- Pour caramel into a deep vessel for dipping. The caramel will need to cool for a few minutes before dipping for it to stick properly.
- Place your toppings into shallow bowls or plates and line them up close to your dipping station.
- Dip each apple into the caramel. Let the excess caramel drip off the apple and then invert the apple for a few seconds to give it a little more time to cool and to distribute the caramel better. Dredge in the toppings.
- After dipping and coating, place the apple on the lined sheet pan and refrigerate to set the caramel and to keep the apples fresh until you eat them.


