

Producing homemade jam is an experience that connects you with the farmers that grow seasonal produce, the process of working with that produce, and the joy of taking such delicious fruit and turning it into a reduction that captures the flavor of fruit at the peak of its ripeness. For my family, it’s a yearly tradition to make several flavors of jam throughout the season- saving jars to give as gifts for holidays and birthdays. Jam production is not only accessible to us today, but it keeps a century-old tradition of preservation alive.

History of Jam
Jam, preserves, chutney, marmalade, compote, and jelly all have different textures, and at times flavors, but represent the age-old tradition of preserving fruit to last years - staving off bacteria, mold, and when sealed, pests and vermin. The advent of now-commonly utilized freezing as a sustainable method of preservation is fairly new, having come along with the prominence of ice/salt fish preservation, and later icebox technology in the 1800s. Therefore, for most of human existence, salt and sugar have been the prominent tools of preservation. Sugar syrups and honey have been used to suspend fruit for millennium, able to hold fresh fruit safely for years. Even in the stone age, salt was used to preserve meat for long journeys, while early civilizations like Ancient Greece preserved quinces in honey. All of these methods were the early precursors to our current methods of jam preservation, yet their methods are shockingly similar to ours today.
 Like many other spices, methods of culinary production, and ingredients, sugar was carried throughout the world by war. During the crusades, sugar was carried from the Middle East into Europe, making jam production easier and the product itself more popular. Joan of Arc herself was said to have consumed quince jam for courage. In the late 1700s, prompted by a financial reward from Napoleon to find ways to preserve food for soldiers, Nicholas Appert, the “Father of Canning,” brought the process of boiling and sealing a product to keep it safe to prominence.

Sourcing Fruit for Jam
The process of jam production that I’ve learned starts with the fruit itself. The best jams I’ve ever made were from the most locally grown fruit, preferably your backyard. I was very lucky that my grandparents owned a cottage in France for much of my childhood - one with a crabapple tree in the front yard. While crab apples aren’t the best to eat, they make a wonderful apple butter, and fresh bread paved with the luscious, pale pink fruit spread is one of the best food memories of my childhood. However, it can be hard to grow fruits like cherries, blueberries, and strawberries, common fruits for jam, at home, so the best way to source those is farmers markets. We’re lucky to have an abundance of those in Chicago.
I’ve worked or volunteered at farmers markets for the past two years and building relationships with farmers is the first step to making a great batch of jam. The first jam that I made with market produce was an apple butter made with a massive bag of apple seconds from Sunny Lane Farms, a reward for working at Teresa Brockman’s Evanston Farmer’s Market plant-and-fruit stand. I like to think that the generosity of sharing produce at markets is a continuation of an American tradition. In fact, apple butter was one of the first commonly produced jams in America, as apple tree saplings were brought from Europe.
Nowadays, both trading and wholesale buying are the primary methods for procuring large quantities of fruit for jam. If you can buy seconds from a farmer, less “pretty” but still flavorful fruit, you can often get a great discount for a very large amount. Recently, I was able to buy blueberries wholesale from Joe’s Blues at the Lincoln Square Farmers Market and strawberries from Kajers Farms at the West Loop Farmers Market.
 Local fruit is more sustainable, has a richer flavor, and can even be more affordable than imported or supermarket fruit when purchased wholesale. I suggest that, when possible, you seek out farmers markets for buying fruit for jam. Another great trick is to buy fruit frozen at the peak of its ripeness from farmers like sour cherries. With an especially short season, farmers struggle to sell their entire harvests of certain fruits during the short window of production, therefore, they freeze some quantity of fruit, selling it at a discounted price. These sour cherries have no discernible difference in quality when it comes to the final, cooked product.

Process of Jam Production
My mother and I have one book that guides our jam production the Blue Chair Jam Cookbook by Rachel Saunders. Saunders’ ratios are generally spot-on, and her flavor combinations are always striking and delicious. I want to share with you one of my favorite adaptations of one of her jam recipes, and one I made this month, the East Coast Blueberry Jam recipe.
This recipe combines fresh blueberries (Saunders recommends a small or wild blueberry variety - I’ve had great results with normal, domestic blueberries) with vanilla, cinnamon, and lemon juice. I’ve modified this recipe to work well with domestic blueberries, but I did add fresh red currants from my front yard to provide tartness, complexity, and a bit of that “wild fruit” flavor. I also toned down the sugar slightly. Weight is key for jam-making so if you don’t have a scale, invest in one. With improper ratios, your product may be too sweet or not achieve the desired thickness.
 The other key element is pectin. Some recipes use industrial pectin, but Saunders’ recipes are built to achieve the desired texture through a long cooking time and the natural pectin present in the fruit. However, the less you cook fruit, especially blueberries, the better. Blueberries are somewhat high in pectin, yet I find that the addition of a fruit like red currants, which are extremely high in pectin, improves the recipe greatly. I’ve shortened the cooking time to account for such, but keep note that if you omit the red currants, you may have to cook your jam for slightly longer. I love using a large 12-quart copper preserving pan for this recipe, but any non-reactive kettle or large, high-sided pan will work.

East Coast Blueberry Jam
Scroll down for a printable version of this recipe
Adapted from Rachel Saunders’ Blue Chair Jam Cookbook
Yield: 5-6 8-ounce jars
Prep time:
Cook time: 20 minutes
Inactive time: 45 minutes
Total time: 2 hours
2 1/2 pounds fresh blueberries
1 pound 8-ounces white cane sugar
6 ounces strained freshly squeezed lemon juice
1 cinnamon stick
1 teaspoon vanilla extract
Approximately 1/2 pound red currants (optional)
- Sterilize your jars and lids and hold them in a 250 degree oven according to the instructions within the notes.
- Place a saucer with five metal spoons in your freezer.
- Combine all the ingredients in your kettle and place over medium high-heat, stirring constantly. When juice flows freely from the berries, stop stirring and let the mixture cook for 2 minutes.
- Stir well, increase the heat to high, and allow the jam to cook; stirring very frequently. Use a rubber or wooden spatula, scraping the bottom and sides of your cooking vessel.
- When your mixture reaches a boil, cook it for 8-12 minutes more, stirring frequently. Avoid turning down the heat if possible, unless the jam is sticking.
- After eight minutes, or when the edges of the jam are thickening, test for doneness by placing a very small amount of the jam in a frozen spoon. Freeze it for 3-4 minutes, or until the bottom of the spoon is no longer warm nor cold. Tilt the spoon- if the jam runs, it needs more time, if it does not, it is ready.
- When ready, turn off the heat and do not stir. Skim any foam from the jam.
- Do not touch the jam, the sterilized jars, or the lids with an unsterilized tool. Pour the jam into your sterilized jars, being extremely careful not to spill the jam on the rim, and leaving space for the lid.
- Close your jars by placing a jar ring over the lids, and tightening. Process according to the notes.
- Once you have opened a jar, keep it refrigerated.
Notes:
I prefer “Ball” brand jars and lids. To sterilize your jars and lids initially, use the oven. Clean your jars and lids, and place the jars upright with your lids on a baking sheet in a 250 degree oven. Keep them in the oven for at least 30 minutes, and take them out carefully when ready to use.
To complete final sterilization, place the closed jars in the preheated oven for about 15 minutes. Take them out. Allow them to set overnight at room temperature upon a drying rack. The next day, ensure that each jar is sealed by feeling the center, if it has not developed a very slight concave in the center of the lid, it must be refrigerated.
 Jam is a real treat, and can carry the flavors of summer deep into the winter. Make it, experiment, and maybe your own jam-making tradition will come about. The provided recipe makes a true jam, with fruit fragments and texture, but recipes can range from preserves to jellies in texture.
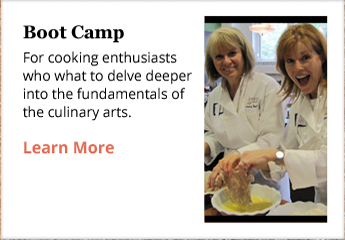
 The Chopping Block offers a Hands-On Pickling and Canning class during the summer that focuses on fresh produce. You'll learn to make:
- Peach-Vanilla Jam
- Roasted Tomatillo-Jalapeño Salsa
- Pickled Giardiniera with Peppers, Carrots and Cauliflower
- Caramelized Red Onion and Apple Chutney
Join us on Saturday, July 6 at 10am at Lincoln Square to learn about the specific tools, techniques and canning ingredients so you have a solid understanding of how to properly "put up" this summer's fruits and veggies to enjoy them for months to come. We also have sessions in August and September.

East Coast Blueberry Jam
Ingredients
- 2 1/2 pounds fresh blueberries
- 1 pound 8-ounces white cane sugar
- 6 ounces strained freshly squeezed lemon juice
- 1 cinnamon stick
- 1 teaspoon vanilla extract
- Approximately 1/2 pound red currants (optional)
Instructions
- Clean your jars and lids, and place the jars upright with your lids on a baking sheet in a 250 degree oven. Keep them in the oven for at least 30 minutes, and take them out carefully when ready to use.
- Place a saucer with five metal spoons in your freezer.
- Combine all the ingredients in your kettle and place over medium high-heat, stirring constantly. When juice flows freely from the berries, stop stirring and let the mixture cook for 2 minutes.
- Stir well, increase the heat to high, and allow the jam to cook; stirring very frequently. Use a rubber or wooden spatula, scraping the bottom and sides of your cooking vessel.
- When your mixture reaches a boil, cook it for 8-12 minutes more, stirring frequently. Avoid turning down the heat if possible, unless the jam is sticking.
- After eight minutes, or when the edges of the jam are thickening, test for doneness by placing a very small amount of the jam in a frozen spoon. Freeze it for 3-4 minutes, or until the bottom of the spoon is no longer warm nor cold. Tilt the spoon- if the jam runs, it needs more time, if it does not, it is ready.
- When ready, turn off the heat and do not stir. Skim any foam from the jam.
- Do not touch the jam, the sterilized jars, or the lids with an unsterilized tool. Pour the jam into your sterilized jars, being extremely careful not to spill the jam on the rim, and leaving space for the lid.
- Close your jars by placing a jar ring over the lids, and tightening. Place the closed jars in the preheated oven for about 15 minutes. Take them out and let cool overnight at room temperature on a rack.
- The next day, ensure that each jar is sealed by feeling the center, if it has not developed a very slight concave in the center of the lid, it must be refrigerated.
- Once you have opened a jar, keep it refrigerated.