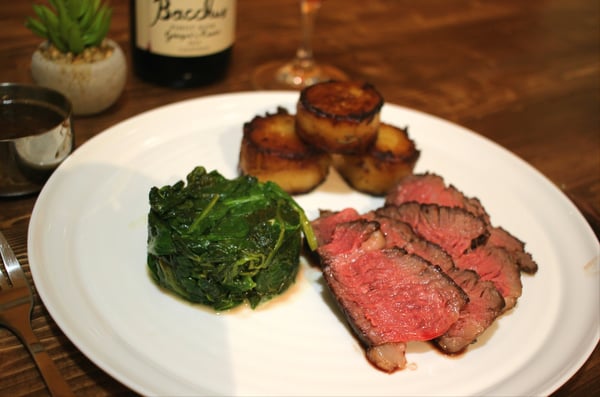
There are many ways to cook a steak, but this one is my favorite. By combining a little modern thinking (i.e. sous vide) with the ancient power of cast iron, we can achieve world-class results with minimal effort. This method is also incredibly easy to do, and results in the best steak I have ever eaten. So, how does it work?

Sous vide is not magic. All we are doing is sealing some meat, in a plastic bag, and dropping it into some water that is the exact temperature we want the food to be. The meat reaches its ideal temperature and stays there, essentially putting itself on hold, until you are ready for it. It stays moist, and because the temperature is so precise, it never overcooks. Finish it in a cast iron pan for color and flavour, and you are golden. It is practically fool-proof.
Yes, there is a lot more to be said, and a lot more you can do with the technique of sous vide, but for that, you need to invest in an immersion circulator. If you don’t have one, and fancy dipping a toe in the (precisely heated) water, this is where to start. This is your gateway dish, and the only special equipment you’ll need is a Ziploc bag and a hot tap.

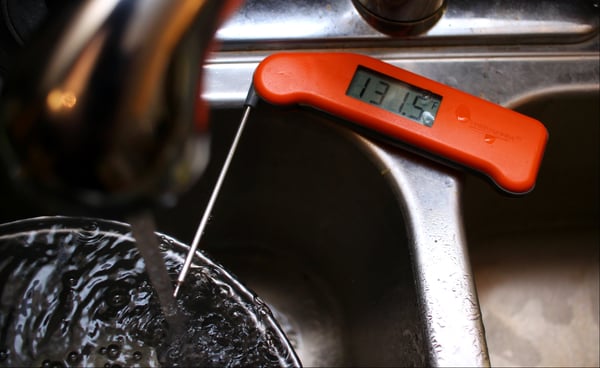
The reason it works is that the temperature of the water coming out your hot tap is pretty much perfect for a medium-rare steak. Mine is about 130F. Ideally, check it with a thermometer, but if your water is hot, but not instantly scalding, you are in the right neighborhood, and you are just about ready to make the best steak in the world!
Let us take a moment to consider the primal majesty of a 48-ounce Rib Steak.
Yep, it was love at first sight. Just sitting there in the meat section of my local supermarket, on sale at a mere $21. Winner! It practically jumped into my cart before I even had time to think about it. Just look at that marbling!
You see, this just happens to be my all-time favorite steak. Tender, tasty and studded with rich seams and pockets of delicious beef fat, this is the absolute king of steaks, and deserves to be treated with respect.
So let’s get started. Season the steak liberally with salt and pepper, and place it in the Ziploc bag with any aromatics and fats you like – you don’t have to do this, but I have discovered that a combination of butter, garlic, soy sauce, a splash of liquid smoke and a bunch of thyme works wonders.
Place the bag in a large pot under the hot tap in your sink, push it most of the way under the water as you seal it, to get all the air out. Now, keep that hot water running at a slight trickle, and relax. Congratulations, you have just created an immersion circulator.
Your steak is also relaxed and happy, and cooking at a gentle pace. The movement of water will keep the temperature even. A 1.5-inch thick steak will take at least 2 hours, and will stay perfect and ready for many hours to come. I did some tests, and running the hot tap at a bare trickle for two hours works out the same as running a deep bath. Cooking things immersed in water is very efficient, and you are using no more energy than you would by cooking on the stove or roasting in the oven.
My philosophy of cooking steaks is simple. The thicker the better. Wherever possible, I want an inch at the very least. Ideally two. This is because I want a plentiful amount of meltingly tender pink interior, but I also want a deeply caramelised outer crust. This is where a lot of the flavor comes from. I really want the exterior to be so deeply charred it is actually crunchy, like a meaty tree-bark. This textural contrast makes me extremely happy, and is simply not achievable with a thinner steak - the middle will be over-cooked long before the char has time to develop.
Second, ALWAYS finish your steak in a cast iron pan. I dislike griddle pans, and I don’t understand why a pattern of thin ‘grill marks’ is an attractive thing. For all the flavor they provide, you might as well draw them on with magic marker. I am much more likely to put a cast iron pan on an outdoor gas grill than use the grill itself. This is because the more surface area we can get in contact with the meat, the more browning and caramelisation you get, the more flavor you develop. It really is that simple. To achieve this, we need a constant, reliable source of high heat, and for that, cast iron has no equal, it stores up heat and gives it back to you when needed.
Okay, at least two hours have gone by, maybe up to four, we are in no rush here. Perhaps you have been entertaining guests, or out on a hot date. Time to finish that steak. Remove it from the bag and let it rest while you heat up the cast iron skillet. Yes, it does look somewhat gray and uninspiring right out of the bag, that is normal, but just you wait! The skillet needs to be really hot, so give it at least five minutes on a high heat.
Oil the skillet, pat the steak dry with paper towels, apply some more salt, and introduce it to some blazing hot cast iron. Leave it, untouched, for at least five minutes, do not poke or prod it, don’t even look at it! This is how we develop the flavor. After four or five minutes, carefully flip it, and this is what we have:
Look at that! Browned, crunchy exterior, absolute perfection. Give it another five minutes on the other side then remove from the pan and rest.
Oh my. This is world class. Truly a thing of wonder. Slice it up, serve with some vegetables if desired, and get ready to modestly brush off a ton of compliments from your appreciative dinner guests. You can tell them how ridiculously easy the whole process was if you really want to, but this part is entirely optional.
If you happen to be missing that integral cast iron skillet from your kitchen, you are in luck! All cookware, including Lodge Cast Iron, is 20% off this month at The Chopping Block. We also have our popular hands-on Steakhouse DIY which focuses on other preparations of steak. Once you take this cooking class, you'll never pay expensive steakhouse prices again since you'll be enjoying the classics at home!
Join us for Steakhouse DIY on:
- Thursday, February 22 7pm Lincoln Square
- Saturday, February 24 7pm Merchandise Mart
