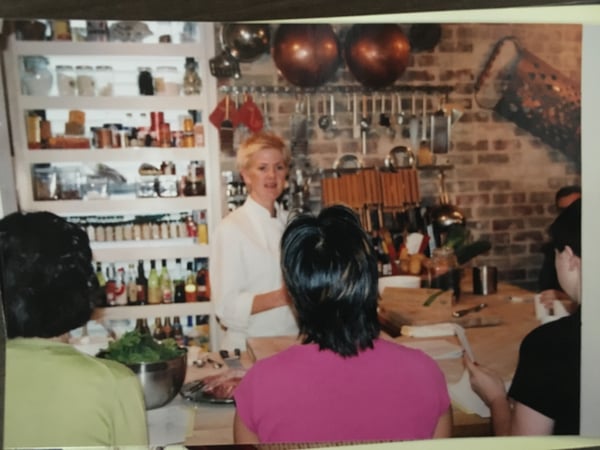
Back in the early days of The Chopping Block 20+ years ago, I was working on holiday curriculum with my fellow Chef Instructor Lisa Futterman. We thought a candy class was a no brainer, after all, who doesn’t love a little Christmas confection? We included one of America’s favorite confections fudge in the class. We were fast approaching the date of class and needed to pull together the recipes. I just assumed Lisa had a great fudge recipe, and she in turn thought I would have one. It turned out neither of us did and so we set off in search of the perfect recipe.

We both tested a multitude of recipes, every one of them failing our taste and texture tests. We were in a panic that we didn’t have a good recipe for class. We got to the day of class, taught the class with the recipe we landed on and still weren’t satisfied with it. It took many years and many attempts to land on this one as the best recipe. Fudge is so often too sweet, to grainy or too dry and sometimes all three. If you follow these step-by-step instructions, I promise you will enjoy the results as this is an ultra-creamy and perfectly sweetened fudge.

Before you start preparing this recipe, I want to stress the importance of a candy thermometer. It really is the key to ensuring perfect results, which is a creamy and smooth texture. You can easily order them online or call our Lincoln Square store and order one for curbside pick up.
Step 1: Prepare Pan
Line 8 x 8 baking dish with aluminum foil. Press the foil gently but firmly against the pan until it is snug against the sides of the pan. Make sure to leave an overhang of a couple inches as this will help to get the fudge out later. Brush the foil lightly with a neutral oil like grapeseed or spray with non-stick cooking spray.
*Note I didn’t have an 8 x 8 baking dish so I started with a 9 ½ x 9 ½ inch. When I went to put the fudge in and spread it out it seemed like the fudge was going to be to thin. I moved the fudge (easily done because of the foil) to a 6 ½ x 8-inch pan and I was much happier with the thickness.
Step 2: Melt Chocolate with Half and Half
I used Ghirardelli Unsweetened chocolate for this recipe. You can easily break apart the pieces and each one is labeled with the weight, especially handy if you don’t have a scale.
Combine the 1 cup of half and half and unsweetened chocolate in 3-quart sauce pan. Heat over a low to moderate heat. Stir regularly until chocolate melts.
Step 3: Add dry ingredients and cook to softball stage
Measure 3 cups of granulated sugar, 3 tablespoons light corn syrup and ¼ teaspoon fine salt and add to the melted chocolate mixture and mix thoroughly.
Place your candy thermometer on the edge of the pan, they come equipped with a clip to do this. At this point do NOT stir the chocolate mixture. This will keep your fudge from crystalizing and getting gritty. I know it is tempting to stir, especially as it begins to boil but resist this temptation.
Bring the heat to medium and cook until the thermometer reaches 238 degrees or soft ball stage.
Step 4: Gather remaining ingredients
Measure 3 tablespoons of unsalted butter and 1 teaspoon of vanilla.
I used peppermint candies but you can also use candy canes. You can also omit them all together if you prefer. My only complaint about this recipe is that the candy dissolves a little on top of the fudge. Not sure if any of you have tips on how to keep that from happening, but it seems unavoidable to me.
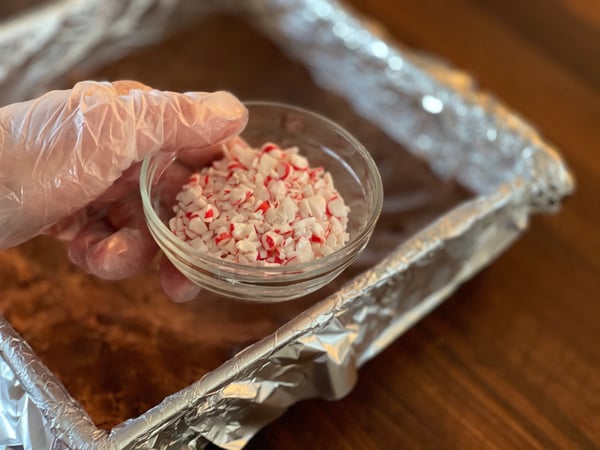
I crushed about 20 pieces of candy by putting them in a Ziploc baggie and whacking it with my rolling pin. Feel free to use a meat mallet or hammer, it might be better for your rolling pin!
I sifted the fine particles out and just used ½ cup of the nicest pieces to top the fudge. Save the fine pieces to stir into your hot tea or cocoa!
Step 5: Cool fudge mixture
Once the fudge reaches 238 degrees turn it off and quickly stir in vanilla and butter. Stir till just combined, do not overmix.
Here comes the hard part, well at least for me. It requires both patience and regular attention. You have turned the heat off and you should now remove it completely from the stove. Let it cool until it reaches 110 degrees. No stirring, just let it sit uncovered.
Step 6: Stir the fudge and place in the baking dish
This part requires a little muscle. Using stiff spatula or wooden spoon stir the cooled fudge until it just starts to lose its shine and gets stiff. If it gets too stiff to stir you can actually knead it a little bit by hand, use rubber gloves to do that.
Move the fudge into the prepared pan. I like to spread it out and smooth it with my hands since the fudge is so stiff.
*This is where I switched to a smaller pan.
Top with peppermint candies and press gently into fudge and let cool completely.
Step 7: Unmold and cut fudge
Put a sheet pan on top of the fudge and turn over.
Remove the foil and turn over onto another sheet pan.
I like to cut the fudge with a bench scraper but a knife will work as well. You just might want to take it off your sheet pan so you don’t ruin it.
Keep covered in a sealed container or in a Ziploc baggie in the freezer.
Old Fashioned Chocolate-Peppermint Fudge
Scroll down for a printable version of this recipe
Yield: One 8-inch pan; 24 pieces
Active time: 35 minutes
Start to finish: 2 hours, 25 minutes
3 ounces unsweetened chocolate, finely chopped
1 cup half & half
3 cups granulated sugar
3 tablespoons light corn syrup
1/4 teaspoon fine sea salt
3 tablespoons unsalted butter
1 teaspoon vanilla extract
1/2 cup lightly crushed peppermint candies
- Line the bottom and sides of an 8”x8” baking dish with aluminum foil. Make sure the foil extends over the sides of the dish by about 2”; this will make it much easier to remove the fudge from the pan. Lightly butter the top of the foil or spray with cooking spray.
- In a large saucepan, combine the unsweetened chocolate and half and half. Cook on medium-low heat, stirring frequently, until the chocolate has melted.
- In a separate bowl, combine the granulated sugar, corn syrup and salt. Slowly add the sugar mixture to the pot while stirring constantly.
- Attach a candy thermometer to the pot, and continue to cook the mixture on medium heat until the thermometer reads 238° (soft ball stage). Do not stir during this process to avoid recrystallization.
- Remove from heat and stir in the vanilla and the butter.
- Allow the fudge mixture to cool until it reaches 110°. Stir the mixture vigorously until it thickens and just begins to lose its shine. Immediately spread the fudge into the prepared baking pan, and sprinkle the crushed peppermint pieces on top. Press the peppermint pieces slightly into the surface of the fudge.
- Allow the fudge to cool completely to room temperature. Use the foil to lift the fudge out of the pan. Cut the fudge into bite size pieces using a sharp knife, and store in an air-tight container at room temperature.
*This is a peppermint fudge recipe but feel free to just leave the peppermint off if you want some straight up fudge.
I hope you enjoy this amazing recipe, and that it brings a little holiday cheer to you and yours. We are not offering any candy classes this season, but we hope you enjoy some of our seasonal classes such as:
- Virtual Cookies with Santa Thursday, December 24 11am CST
- Virtual Family Fondue Party Saturday, December 26 4pm CST
- Virtual New Year's Eve Retro Appetizer Party Tuesday, December 29 6pm CST
- Virtual New Year's Eve Cook Along French Steakhouse Workshop Wednesday, December 30 6pm CST
- Virtual Noon Year's Eve Party Food Thursday, December 31 11am CST
- Virtual New Year's Eve Date Night Surf and Turf Thursday, December 31 6pm CST
Stop by for your candy thermometer by scheduling a private shopping experience or curbside pickup.
Old-Fashioned Chocolate Peppermint Fudge
Ingredients
- 3 ounces unsweetened chocolate, finely chopped
- 1 cup half & half
- 3 cups granulated sugar
- 3 tablespoons light corn syrup
- 1/4 teaspoon fine sea salt
- 3 tablespoons unsalted butter
- 1 teaspoon vanilla extract
- 1/2 cup lightly crushed peppermint candies
Instructions
- Line the bottom and sides of an 8”x8” baking dish with aluminum foil. Make sure the foil extends over the sides of the dish by about 2”; this will make it much easier to remove the fudge from the pan. Lightly butter the top of the foil or spray with cooking spray.
- In a large saucepan, combine the unsweetened chocolate and half and half. Cook on medium-low heat, stirring frequently, until the chocolate has melted.
- In a separate bowl, combine the granulated sugar, corn syrup and salt. Slowly add the sugar mixture to the pot while stirring constantly.
- Attach a candy thermometer to the pot, and continue to cook the mixture on medium heat until the thermometer reads 238° (soft ball stage). Do not stir during this process to avoid recrystallization.
- Remove from heat and stir in the vanilla and the butter.
- Allow the fudge mixture to cool until it reaches 110°. Stir the mixture vigorously until it thickens and just begins to lose its shine. Immediately spread the fudge into the prepared baking pan, and sprinkle the crushed peppermint pieces on top. Press the peppermint pieces slightly into the surface of the fudge.
- Allow the fudge to cool completely to room temperature. Use the foil to lift the fudge out of the pan. Cut the fudge into bite size pieces using a sharp knife, and store in an air-tight container at room temperature.
