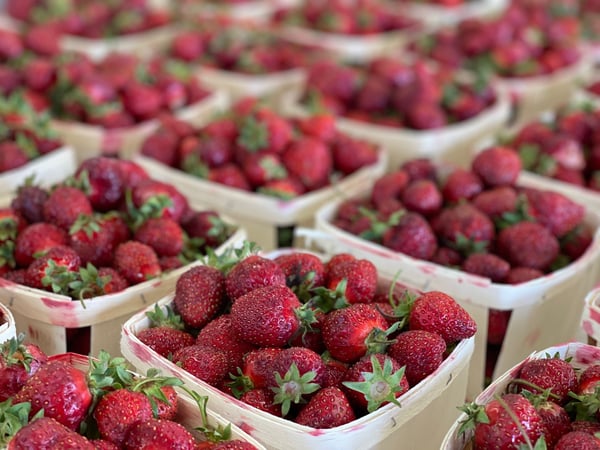
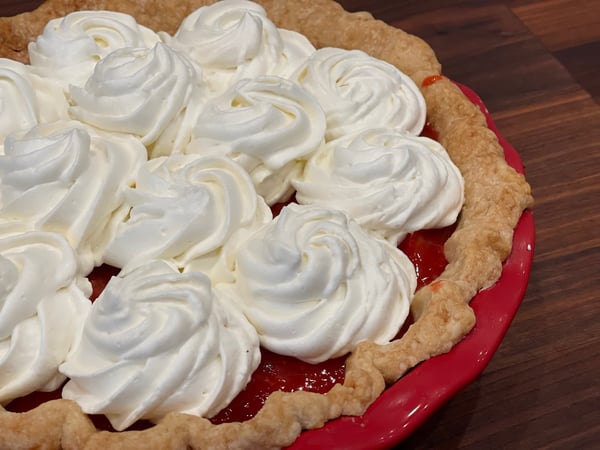
Until I was seven years old, I lived on a small homestead - my grandparents lived on one side and my great grandparents on the other. We grew sweet corn, my grandparents grew green beans, my great grandparents had chickens and even my other grandmother who lived in town grew tomatoes. We all shared in each other’s crops! My grandparents who lived next door, Irma and Virgil, were the only ones with a strawberry patch. Although my grandparents were generous with all they had, I was forbidden from raiding the strawberry patch. They alone harvested the strawberries and shared them only on the most special of occasions. Many of those occasions included strawberry pie.

Most of the recipes I see today are made with strawberry gelatin. I have nothing against strawberry gelatin, but why on earth would you use an artificially flavored strawberry product to flavor a beautiful fresh strawberry pie? Using strawberry gelatin doesn’t provide any kind of shortcut that I can see, so I personally recommend skipping it.
Another beef I have with most strawberry pies are that they leave the strawberries whole. Whole strawberries are clearly striking to look at but really hard to eat and if some of them are not perfect you may end up with a big mouthful of not-so-great strawberry.
I also find most strawberry pies are too sweet. I think the issue is less about the amount of sugar used but the fact that it isn’t balanced with anything else. When you balance the sweetness in the pie with some tartness and salt it also brings out the flavor of the strawberry. This pie is hands-down the best one I have tasted, and it can be made very quickly. Let's be honest - who really wants to spend that much time at the stove right now? It's time to go outside and enjoy the start of summer!

Strawberry Pie
Scroll down for a printable version of this recipe
Makes: 1 9" pie or 8 servings
Prep time:
Cook time:
Inactive time:
2 quarts strawberries
2/3 cup sugar
1 teaspoon lemon zest
1 teaspoon tangerine or orange zest
1/4 cup lemon juice
1/4 cup tangerine or orange juice
3 Tablespoons plus 2 teaspoons cornstarch
1 teaspoon vanilla
1/2 teaspoon salt
1 pre-baked pie shell
4 cups whipped cream
Step 1: Prepare the Pie Shell
Feel free to purchase a prebaked pie shell, if you like. In my recent blog, I shared how to roll a pie crust, and we also have a great video on how to make pie dough.
Once your pie crust is rolled, place into your pie dish and prick with a fork all over the surface. Refrigerate the rolled crust and preheat your oven to 350 degrees. Chilling the crust completely really helps to keep the crust from shrinking. Additionally, place a piece of parchment paper or aluminum foil inside the crust and fill with an even layer of pie weights, pennies (washed) or dried beans, this weight will help to keep the bottom crust from bubbling up and the crust shrinking.
Step 2: Clean and Slice the Strawberries
I like to separate my strawberries. Take the strawberries that are not as red and ripe and use those to prepare the filling. Since they will be cooked a little, the less-perfect strawberries will “ripen” and become sweeter and more flavorful in that process. The better-looking berries will be sliced and folded into the cooked filling.
Step 3: Prepare Strawberry Filling
Mix the lemon and orange juice and the cornstarch. Pour the cornstarch mixture into the boiling strawberries, stirring constantly until the mixture comes to a boil. Turn the heat off immediately and stir in the vanilla. To cool more quickly, transfer the filling to a heat-proof bowl and let cool for 15 minutes.
Step 4: Fill and Chill the Pie
Combine the filling and fresh strawberries and fill the cooled pie shell. Refrigerate until filling is completely chilled, approximately 4 hours.
Prepare your own whipped cream or use your favorite whipped topping to garnish your pie generously. I suggest at least four cups of whipped cream but you may choose to use more.
We also have lots of other fun baking classes coming your way this summer, both virtual and in-person:
- Virtual Custards Workshop Saturday, June 19 2pm CST
- Hands-On Macaron Workshop Sunday, July 11 10am Lincoln Square
- Cupcake Boot Camp Sunday, July 18 10am Lincoln Square
Strawberry Pie
Ingredients
- 2 quarts strawberries
- 2/3 cup sugar
- 1 teaspoon lemon zest
- 1 teaspoon tangerine or orange zest
- 1/4 cup lemon juice
- 1/4 cup tangerine or orange juice
- 3 Tablespoons plus 2 teaspoons cornstarch
- 1 teaspoon vanilla
- 1/2 teaspoon salt
- 1 pre-baked pie shell
- 4 cups whipped cream
Instructions
- Feel free to purchase a prebaked pie shell or make your own from scratch.
- Roll out your pie crust, place into your pie dish and prick with a fork all over the surface. Refrigerate the rolled crust and preheat your oven to 350 degrees. Chilling the crust completely really helps to keep the crust from shrinking. Additionally, place a piece of parchment paper or aluminum foil inside the crust and fill with an even layer of pie weights, pennies (washed) or dried beans, this weight will help to keep the bottom crust from bubbling up and the crust shrinking.
- Bake for approximately 30-40 minutes or until the crust is golden brown on the bottom and sides.
- Let the crust cool completely before filling.
- Take the strawberries that are not as red and ripe and use those to prepare the filling. Since they will be cooked a little, the less-perfect strawberries will “ripen” and become sweeter and more flavorful in that process. The better-looking berries will be sliced and folded into the cooked filling.
- Remove the stems and roughly slice half of the strawberries for the cooked filling. Remove stems and slice remaining strawberries to fold into the filling.
- Place roughly sliced strawberries in a 3-quart sauce pan and turn on low heat. Smash the berries, sugar, salt, lemon and orange zest with a potato masher, the low heat will help to soften the berries slightly to aid with the smashing. Turn the heat up to high and bring the smashed strawberries to a boil.
- Mix the lemon and orange juice and the cornstarch. Pour the cornstarch mixture into the boiling strawberries, stirring constantly until the mixture comes to a boil. Turn the heat off immediately and stir in the vanilla. To cool more quickly, transfer the filling to a heat-proof bowl and let cool for 15 minutes.
- Combine the filling and fresh strawberries and fill the cooled pie shell. Refrigerate until filling is completely chilled, approximately 4 hours.
- Prepare your own whipped cream or use your favorite whipped topping to garnish your pie generously. I suggest at least four cups of whipped cream but you may choose to use more.


