
Most home cooks aren't experts in breaking down meat. That's what we have butchers for, right? But there are plenty of reasons why you should become comfortable butchering different cuts of meat, poultry and fish in your kitchen. We'll explore the ones most relevant to you in this guide. You'll get tips from our professional chefs, as well as lots of photos and videos to help you along the way, with plenty of recipes to practice your new skills.
3: Meat 101
A century ago, both Chicago and New York enjoyed the fame and recognition as premier locations to enjoy what many people said were “the best steaks around.” Legendary celebrities, mobsters, politicians and nationally-renowned food critics continued that reputation throughout the years. That reputation was mainly due to the fact that both cities had world-famous meat packing districts that made this honorary (and somewhat cool) designation possible.
But it was really those Old World immigrants who were the true artisans of fresh, quality butchered meat that could be aged or smoked—and you could order the exact cuts that you wanted with less fat and scraps. The butcher was considered a true craftsman! When this process left the local butcher shops and moved into the slaughter houses, it was no longer crafted or personalized. The meat packing plants were often nasty, unsanitized locations that shipped the same identical looking cuts of meat to every grocer by the truckloads. With the freezing processes that came later, all of the true butcher quality went away.
Today when we shop at our favorite grocery store or markets, most of the meat is already wrapped in cellophane, and we don’t know how long it has been sitting there in that display case. But by learning how to work with different cuts and portions of meat, poultry and fish, you can make the most of higher quality product and manipulate it however you want, rather than working with pre-cut portions.
One of the biggest benefits of learning how to butcher is cost savings. By cutting down larger portions of meat into smaller ones, you'll also cut costs. Chicken can be purchased whole and easily butchered at home (more on that later). Have you ever compared the cost of a whole chicken to a chicken already cut into breasts, wings, legs and thighs? The U.S. Department of Labor reports the average price of a whole chicken was $1.50 per pound in July 2017. The price of boneless, skinless chicken breasts is $3.20 per pound. That's more than double the price!
Larger animals like lamb, pigs or cattle can be purchased in manageable cuts (we don't expect you to have room for a whole pig in your freezer) and frozen. Working with the whole or larger parts of the animal allows us an opportunity to utilize all parts of the body (an age-old approach popular with chefs known as "nose to tail cooking") including bones and fat. Celebrity chefs such as Chris Cosentino have helped the trend gain momentum by opening the public’s mind and palate to lesser-known cuts of meat, including offal (organ meats).

The right knife is certainly important in any food preparation, but it's especially true in butchery. You will need a quality boning or filet knife (pictured left) which is used for removing meat from bones and cutting fish or poultry. Boning knives can have different widths of blades as well as flexibility. Since you'll be cutting around bones and through tough skin, this knife gives you more control when making those precise cuts.
You also need a Chef's knife (pictured right), which typically come in 10-inch and 8-inch length. If you'll be working with larger cuts of meat, you'll probably want to be comfortable with a larger knife. Of course, a Chef's Knife has many uses in the kitchen. For more on how to work with knives properly, download our Knife Skills 101.
You will also need:
 Steel for honing your knives.
Getting started with butchery is easy because you likely already have all of these items in your kitchen. If not, stop in our stores and we'll help outfit you with what you need.

Graphic Reprinted with Permission of Bunzels Old Fashioned Meat Market and Catering
There are actually two separate programs for inspecting and grading meat by the U.S. Department of Agriculture (USDA). Inspection for wholesomeness is mandatory and is paid for with public funds. Grading for quality is voluntary, and the service is requested and paid for by meat and poultry producers/processors.
Inspection
 The inspection process ensures that meat and poultry products are safe, wholesome, and correctly labeled and packaged. You've probably noticed the safe handling instructions which are included on all packages of raw and not fully cooked meat and poultry. You've also probably noticed the purple stamp if you've ever purchased a large cut of meat. Since roasts and steaks are cut after inspection and trimming, there might not be a mark on the meat in your package. Don't worry, the dye used for the stamps is made from a food-grade vegetable dye and is not harmful.
Grading
Grading evaluates tenderness, juiciness, and flavor of meat; and for poultry, a normal shape that is fully fleshed and meaty and free of defects.
USDA grades are based on nationally uniform standards of quality, which means no matter where or when you buy your meat, it will always meet the same grade criteria. Just like inspections, the grade is stamped on the side of beef and is usually not visible on retail cuts. However, retail packages of beef, as well as poultry, will show the U.S. grade mark if they have been officially graded.
These are the only grades you'll see in the grocery store, though there are more categories that are used to make ground beef and processed products.
Grass-fed Beef
You've probably also noticed an increase in the amount of grass-fed beef available in stores in recent years. According to the Cattlemen's Beef Board, grass-fed beef comes from cattle that have been allowed to forage and graze for their own fresh food their entire lives. While most cattle spend the majority of their lives in pastures eating grass before moving to a feedlot for grain-finishing, in order to be labeled grass-fed or grass-finished by the USDA, producers must demonstrate 99% or more of their animals’ energy came from grass and/or forage.
Lamb
There are five grades for lamb, but normally only two grades are found at the retail level: prime and choice. Lamb is produced from animals less than a year old.
Pork
Pork is not graded with USDA quality grades as it is generally produced from young animals that have been bred and fed to produce more uniformly tender meat. Appearance is an important guide in buying fresh pork. Look for cuts with a relatively small amount of fat over the outside and with meat that is firm and pink in color. For best flavor and tenderness, meat should have a small amount of marbling.
Poultry
To make things even more confusing, the USDA has separate grades for poultry.

The most important consideration in selecting the proper cut of meat is to match the cooking method with the type of meat. Tender cuts can be cooked quickly since they need no tenderization, while tougher cuts are most successfully prepared using longer, slower cooking methods, preferably with the addition of moisture to help break down the tougher fibers.
Examples of quick, “dry” cooking methods include sautéing, roasting, and grilling, while moist methods include stewing or braising. Would you subject an expensive filet mignon to the same cooking process as a pot roast? If you did, it would not show its best traits—its rich flavor and buttery texture. And what if you briefly seared a lamb shank and served it rare? It would not have the chance to develop the melt-in-your-mouth texture and deep flavor it achieves with a long braise.
Pro Tip: Clues to a cut of meat’s tenderness lie in the location of the cut on the animal. Tender cuts come from muscles that are less used, most often in the ribs and loin of the animal. Tougher, more flavorful cuts are well-exercised, like a leg or a shoulder. That old rooster that has been running around the yard is destined for the stew pot, while the tender hen that has been minding her eggs will be quickly sautéed.
Tenderness is also indicated by the amount of fat or marbling in the meat. This fat is different than the fat that surrounds the steak or chop, which should be trimmed closely. Leave the fat on the outside of a roast, because it protects the tender meat within from the dry heat of the oven, providing a juicier result.
Pro Tip: Many people have strong preferences as to whether or not to purchase meat “on the bone.” Some cuts, like a prime rib roast, should be roasted bone-in to protect the meat from the intense heat of the oven. Steaks and chops also gain protection from a bone, but if your preference is towards a neat, boneless presentation, there are many boneless cuts to choose from.
 It would be impossible to cover all of the different beef cuts in this guide. However, we'll focus on a sub-primal cut of the cow that can be broken down into many different cuts, the short loin. This is an impressive piece of meat because of its size and yield. You'll notice that purple stamp we mentioned earlier.

Depending on how you cut it, the short loin can yield all of these cuts from this one piece of meat:
To get Porterhouse and T-bones, you'll need a saw to cut through the bone. The larger side of the short loin will yield Porterhouse steaks, while the smaller side will be T-bone steaks.

If you prefer to cut the short loin into the tenderloin and strip steaks, you'll first remove the strip by making small shallow cuts with the tip of your boning knife and following the curvature of the bone.


You'll be left with one one large strip of meat.

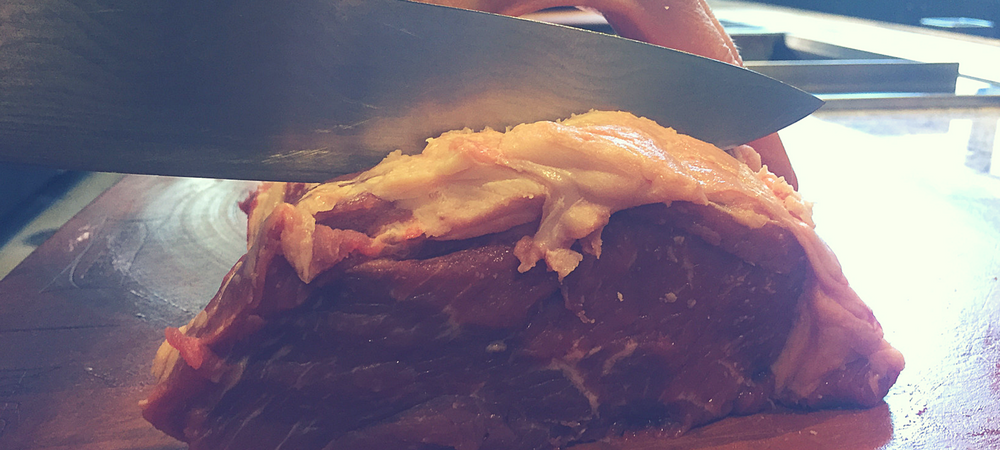
The next step is to remove some of the fat cap from the strip and then cut into the desired thickness of your steaks.

You'll be left with New York Strip steaks, also known as Kansas City Steaks, Top Sirloin or Top Loin.

Next, you'll remove the tenderloin, which is one of the most sought-after parts of the cow because the meat is extremely tender with an almost buttery texture. It's also called Filet, Filet Mignon, Châteaubriand (when cut as a large, center-cut roast), and Tournedo (when cut from the smaller tapered section of the tenderloin).

The next step is to remove the silverskin, which Shelley shows you how to do in this video:
The next step is to remove what's called the "chain" which can be trimmed of its fat, and the meat used for soups, stews and chili.

If you prefer to keep your tenderloin whole, here's a foolproof way to roast it to make sure that expensive cut of meat doesn't get overcooked. Watch Shelley's method in this video:
If you decide to cut the tenderloin into steaks, cut the tenderloin into the desired thickness.

Either filets or strip steaks are a good choice for one of our favorite preparations, Steak au Poivre.
Yield: 4 servings
Active time: 25 minutes
Start to finish: 1 hour
For the steaks:
Four 5-to 6-ounce steaks (filet mignon, New York strip or rib-eye)
1/4 cup whole black peppercorns
Sea salt to taste
2 tablespoons grapeseed oil
For the sauce:
2 tablespoons butter
1 shallot, thinly sliced
1/4 cup Cognac or brandy
1 tablespoon Dijon mustard
1/3 cup chicken stock
1/2 cup heavy cream
Salt to taste
Note:
If steaks are well seared but not cooked through to your liking, place them in a 350º oven for 5 to10 minutes, until they reach the desired temperature.

Need help knowing when meat is done? Here's the simplest way to cook a steak.
Steak is obviously a great choice for grilling as well. Our favorite way to finish a steak from the grill is to top it with a compound butter, which is a combination of butter and aromatic ingredients. You can't miss by topping your grilled steaks with the Bacon Blue Cheese version Shelley demonstrates in this video on How to Make Compound Butter.

Yield: 4 servings
Active time: 10 minutes
Start to finish: 15 minutes
For the steaks:
2 12-ounce strip steaks
1 tablespoon grapeseed oil
Salt and pepper to taste
For the Bacon Blue Cheese Butter:
1 stick of unsalted butter, room temperature
4 pieces of bacon, cooked until crisp and crumbled
1/4 cup of blue cheese, crumbled
2-3 tablespoons of parsley, minced
Place all ingredients for the Bacon Blue Cheese Butter in a small bowl and mix thoroughly.
Butter can be rolled into a log and wrapped in plastic wrap or parchment paper and frozen for up to 6 weeks.
To prepare the steaks, heat a gas or charcoal grill over medium heat.
Rub the steaks with the grapeseed oil, and season with salt and pepper to taste.
Grill until well-marked, 3 to 4 minutes. Give the steaks a quarter turn to create diamond grill marks. Continue to cook an additional 3 to 4 minutes or until well-marked.
Flip the steaks over and cook in the same fashion as the first side, until the steaks are cooked to your liking. An internal temperature of 125° is ideal for medium rare.
Top each steak with Bacon Blue Cheese Butter as soon as they come off the grill, and allow them to rest for 5 minutes before serving.

Not many home cooks are likely to buy a whole pig (unless a backyard pig roast is on the agenda) and break it down. But just like beef, purchasing in larger cuts can save you money, especially if you've got plenty of freezer space.
The Chopping Block offers a Whole Hog Butchery demonstration class taught by Mario. In this class, you learn the different cuts of a pig and which ones you should choose for different recipes and why. Mario butchers a whole pig, showing you all of those cuts and then prepares a pork-centric meal.

Here's a brief summary of the types of cuts and the best ways to cook them:
Pork Shoulder: This is also known as Pork Butt or Boston Butt and is generally sold as a 5 to 10 pound boneless roast at the grocery store. Mario says this type of cut is best for braising, slow and low roasting or barbecue. Think Pulled Pork!
Picnic Ham: This is also known as Picnic Shoulder and is also relatively tough and fatty, like the Pork Shoulder. Braise or smoke this cut and be sure to save the fat cap for making cracklings!
Country Style Spare Ribs: These come from the Picnic Ham and have a combination of light and dark meat. They typically come boneless and are best braised or cooked slow and low on the grill.
Hock: The front hock is known as the Ham Hock and the rear hock is similar to the front. They usually come already brined and smoked. Add hocks to a pot of beans or collard greens.
Pork Loin: This cut comes from the pig's back and is lean and tender. Roast it whole but be careful not to overcook it or it becomes dry very easily.
Pork Chops: Thick or thin, bone-in or bone-less pork chops are cut from meat perpendicular to the spine, often from the loin. Use high heat cooking methods like grilling, broiling or frying for these.
Baby Back Ribs: These ribs are actually part of the pork loin so they are a more tender rib option. They are meatier than spare ribs but not as meaty as country-style ribs. They are great for braising, barbecuing or baking. Here's Mario's favorite recipe for Baby Back Ribs.
Pork Belly: This is where bacon comes from! Bacon is pork belly cured, smoked and sliced. It can also be cooked fresh and is typically braised.
Spare Ribs: These ribs come off of the belly. If they says St. Louis-style, that means they are squared off so that they cook more evenly. These ribs are meant for smoking, baking or low-temp grilling. Try Chef Sara Salzinski's method for Asian-style spare ribs.
Sirloin: This cut is often broken into chops. They are close in tenderness to pork chops but they have more muscle in the leg so there is more flavor.
Rear Leg: This is known as ham, and it comes cured, smoked or processed in some way. This is where prosciutto comes from.

How to Tell When Meat Is Done
Some of the most common questions that arise when we cook meat in our cooking classes involve doneness.
Although cutting into the center of a steak enables you to see the color of the meat inside, it also mars the appearance of the steak and allows juices to run out, drying out the meat. We recommend using an instant-read thermometer, which has a thin skewer that can be inserted into the food, providing an instant readout of the internal temperature without compromising the texture of the meat.
Pro Tip: Instant-read thermometers can also be used when making custards, breads, and desserts that require an internal temperature reading.
The list below shows the proper Chopping Block temperatures for various meats. Notice that different meats require different temperatures to be at their best.
Beef and Lamb (steaks and roasts):
Pork and Veal: 135 º to140°
Chicken/Turkey Breast: 155°
Chicken/Turkey Thigh: 170 º
Pro Tip: For accurate readings, make sure that the thermometer tip rests in the center of the meat, not touching the bone or the pan it is being cooked in.
Also note that the internal temperature will continue to rise after the meat has been removed from the oven, stove, or grill. As the meat rests, awaiting carving and serving, it will continue to cook, adding about 5º to the internal temperature.
It's especially important to use a thermometer to be able to tell when a roasted tenderloin is done, whether beef or pork. The process of cleaning a pork tenderloin is similar to procedure we showed you for the beef tenderloin above. In this recipe from our Culinary Boot Camp, we also butterfly, stuff, tie and roast the tenderloin.
 Yield: 6-8 servings
Active time: 45 minutes
Start to finish: 1 hour 30 minutes
1 cup prunes, coarsely chopped and soaked in 1 cup balsamic vinegar for 20 minutes
1/4 cup black olives, pitted and rough chopped
1/4 cup pine nuts, toasted
4 roasted garlic cloves, rough chopped
1/2 teaspoon dried thyme
1/4 cup parsley, rough chopped
Salt and pepper to taste
One 3- to 4-pound boneless pork loin roast, butterflied
2 tablespoons grapeseed oil
For the sauce:
1 tablespoon butter
1 large shallot, sliced
Reserved balsamic vinegar
1 cup chicken stock
Salt and pepper to taste
1 tablespoon cold butter

Lamb is a sheep in its first year that is typically slaughtered between four and 12 months old. Mutton is also sheep but it is usually harvested at about three years old. It's much fattier than lamb and not particularly common here in the United States. You've probably had leg of lamb at some point, but let's move beyond the popular joint cut and explore other parts of the lamb.
Leg of Lamb: This tender cut can be purchased in different ways, from the full leg to the shank (or lower) end or the sirloin end. Bone-in leg of lamb will take longer to roast or barbecue, but doesn't require tying with twine like a boneless leg of lamb does. It’s a fairly lean muscle, so be careful not to overcook it, or it will be dry.
Chops: These are the most expensive cuts of lamb, but they are tender and delicious.
Shoulder: This part of the animal is used a lot during its life, so it tends to be tough. Shoulder meat is easily made tender by stewing and slow and low roasting. You may also see this sold as a square-cut shoulder.
Top Round: This tender, flavorful cut comes from the leg. Use it for kebobs, thin steaks or a quick-cooking roast.
Shank: Lamb shank is a less expensive cut that goes a long way. It's taken from the lower part of the back legs which means it contains a lot of collagen. When this cut is braised, the meat gets a soft, melting texture from that collagen, making this a perfect choice for stews and slow-cooking.
We mentioned the technique of "frenching" earlier in which meat is removed from the end of the bones. This is strictly for appearance purposes, but it gives an impressive presentation perfect for entertaining. Your guests will feel they are getting a restaurant quality meal at home! Note this technique can easily be applied to pork, venison or beef.

How to French a Rack of Lamb
1. Trim away the thick layer of fat covering the ribs. Just like with the beef tenderloin Shelley cleaned in the video, pull as much fat off of the lamb as you can with your hand rather than cutting it off with your knife. You'll keep more of the meat intact this way.
2. There is often a large tendon running right underneath the loin. Trim this tendon off, along with any additional fat.
3. Flip the rack over so that the ribs are exposed. Using the tip of your knife, score the membrane along the center of each bone by placing the tip of your knife against the bone starting about an inch and a half away from the cut end of the bones, and pulling your knife slowly and firmly down the bone to its end. Your bone should trace a path right down the center of each bone, not in between the bones.
4. Using a dish towel to grip the slippery fat, pull fat and membrane away from between each rib slowly and firmly. It should pull cleanly away from the bones. Continue working away from the bones until about two inches are exposed (more or less, depending on the size of the lamb and how much bone you want exposed).
5. Flip the rack over and use your knife to cut away the flap of fat and membrane you just pulled apart.
6. Most of the fat and membrane should have come cleanly off the bones but some will remain stuck to the bone. Use your boning knife to scrape the rest of the connective tissue off the bones.
If this feels like too much work for you, you can always have your butcher do it for you.
Yield: 4 servings
Active time: 15 minutes
Start to finish: 35 minutes
2 tablespoons grapeseed oil
1 rack of lamb
Salt and pepper to taste
1/4 cup Dijon mustard
1 teaspoon fresh rosemary, finely chopped
1/2 teaspoon fresh thyme, rough chopped
1 cup panko breadcrumbs
For the sauce:
2 tablespoons butter
2 shallots, thinly sliced
1 cup red wine
2 cups beef stock
1 tablespoon Dijon mustard
2 sprigs thyme
1 bay leaf
2 tablespoons cold butter, diced
2 tablespoons fresh parsley, rough chopped
Salt and pepper to taste
Chicken is arguably the most versatile and beloved dinnertime staple. We break down the parts and what type of cooking method is best for each, as well as what you need to know in terms of USDA regulations.

All you need to know in general terms is:
Here are a few of the key requirements for organic poultry, cattle and pigs:
In terms of “classes” of chicken there are only a few options according to the USDA:
A lot of people avoid buying whole chickens because they think cutting a chicken into parts (or "breaking it down") is difficult. But it's actually pretty easy with a little practice. The key is to let your knife follow the natural curves of the chicken's body. Here's how you do it step-by-step:

Hold the chicken by the tail and run your knife on one side of the backbone. Let the knife follow the contour of the bones.

Turn the chicken over and split it down the middle of the breast bone.

You are left with two halves of the chicken, the backbone attached to one. Remove the backbone by cutting down the other side of the bone just as you did on the first side.

Take one of the sides of the chicken and push the breast and leg together. You'll see a natural curve and a ligher coloration that you'll follow with your knife.

You will be left with quarters.

Next, find the joint between the leg and thigh. Again, look for the natural line in the chicken and then follow it with your knife.

To separate the wing from the best, again find the natural line and follow it with your knife. You are using the knife to separate the chicken at the joints, not necessarily cut through any bone.

Repeat these same steps on the other half of the chicken, and you will end up with two wings, two breasts, two thighs and two legs.

Shelley also has a video you can use as a refresher on how to How to Cut a Chicken.
Then, if you like, tuck the wings underneath and bend them back underneath the bird. Tuck the thighs and legs together and you are ready to cook your chicken.

Shelley puts it all together for you in this video of How to Spatchcock a Chicken.
The part of chicken you are cooking will help dictate what cooking method should be used. Spatchcock chicken works great in the oven or on the grill.
Yield: 3-4 servings
Active time: 35 minutes
Start to finish: 1 hour, 35 minutes
One 3 1/2- to 4-pound whole chicken
1/2 red onion, medium dice
4 scallions, thinly sliced
2 teaspoons fresh thyme, rough chopped
1 teaspoon sea salt
2 teaspoons granulated sugar
1 teaspoon ground allspice
1/2 teaspoon ground nutmeg
1/2 teaspoon ground cinnamon
1 habañero or scotch bonnet pepper, seeds removed if desired
3 tablespoons soy sauce
1 tablespoon grapeseed oil
1 tablespoon apple cider vinegar
Salt and pepper to taste
Lime wedges for garnish
Yield: 2 cups
Active time: 15 minutes
Start to finish: 45 minutes
1 ripe mango, peeled and cut into medium dice
1/2 medium red onion, cut into medium dice
1/2 seedless cucumber, peeled and cut into medium dice
1 jalapeño, minced
Zest of 1 lime
Lime juice to taste
1 tablespoon extra virgin olive oil
2 tablespoons fresh mint, rough chopped
2 tablespoons fresh cilantro, rough chopped
Salt and pepper to taste
Whether you choose to spatchcock or not, there's nothing more comforting than the smell of a chicken roasting in the oven. Shelley shows you how easy it is in our How to Roast a Chicken video.
Here's another simple recipe for roast chicken to try at home.

Yield: 4 servings
Active time: 25 minutes
Start to finish: 1 hour, 40 minutes
One 3- to 4-pound whole chicken
1 stick butter, room temperature
2 tablespoons fresh oregano, minced
2 tablespoons fresh parsley, rough chopped
2 cloves garlic, minced
1 teaspoon lemon zest
Salt and pepper to taste
1 lemon, halved
Preheat oven to 375º.
To prepare the chicken, unwrap it and be sure to take the bag of giblets out of the cavity, if there is one. Place the chicken on a roasting rack over a roasting pan or sheet tray..
In a small bowl, mix together the butter, oregano, parsley, garlic and lemon zest.
Rub the compound butter under the skin of the chicken, as well as on the outside. Sprinkle generously with salt and pepper on both sides. Fold and tuck the wings underneath the bird.
Roast the chicken, breast side up, until the dark meat reads 165° on a meat thermometer, approximately 1 hour to 1.5 hours.
Allow the chicken to rest for at least 15 minutes on a cutting board with a juice groove.
To carve the chicken, remove the leg and thigh quarters first. Separate the leg from the thigh, and place the pieces on a platter. Remove the breasts. Cut the breasts into 1-inch slices and place on the platter.
Garnish skin side of meat with oregano sprigs, if desired, and finish with a fresh squeeze of lemon juice.
Frying is another technique that works well for all parts of the bird. Shelley has an unusual technique for frying her chicken that uses lard instead of oil. It's definitely not low fat, but you'll be pleasantly surprised with how easy the clean up is. Watch our How to Fry Chicken video.
The legs and thighs of the chicken are the dark meat on the bird. It's more flavorful than white meat and is very juicy, which makes it difficult to overcook. The legs and thighs are good choices for broiling, roasting, grilling and braising, like this classic chicken cooked in red wine.
Yield: 2-4 servings
Active time: 45 minutes
Start to finish: 2 hours
2 tablespoons grapeseed oil
2 chicken legs and thighs
Salt and pepper to taste
4 slices bacon, cut into strips
1 1/2 cups pearl onions, blanched and peeled
1/2 pound white or cremini mushrooms, cleaned and quartered
1 large shallot, finely chopped
2 medium carrots, diced
1/4 cup cognac or brandy
1 cup red table wine
1 cup chicken stock
1 teaspoon herbs de Provence
Salt and pepper to taste
2 tablespoons unsalted butter, room temperature
2 tablespoons all-purpose flour
2 tablespoons fresh parsley, rough chopped
Reduce the heat to medium-low, and sauté the bacon until the fat has rendered.
Add the onions and mushrooms to the bacon; once caramelized, add the carrots and shallots and sauté briefly. Add the cognac to deglaze the pan.
Return the seared chicken to the pot with the wine, stock and herbs de Provence. Season with salt and pepper.
Bring to a boil, and then reduce the heat to low and allow to simmer covered for one hour, turning the chicken pieces once after 30 minutes.
Knead together the butter and flour to form a paste. This paste is called a beurre manié. After the chicken has cooked for an hour, whisk in the beurre manié and simmer until thickened. Taste and correct seasonings, sprinkle with parsley, and serve.
Perhaps the most well-known part of the chicken is its breast. The white-meat midsection is sold in three cuts: halved split breasts (sold boneless and skinless or with bone and skin on); boneless, skinless cutlets (pounded thin, so they cook quickly); and tenderloins (strips taken from the muscle portion). These cuts are best for broiling, grilling, pan frying or sautéing. Here's another classic chicken recipe that should be part of every home cook's repertoire.
Yield: 4 servings as an entrée
Active time: 25 minutes
Start to finish: 25 minutes
4 chicken breasts, boneless and skinless
Salt and pepper
All-purpose flour, for dredging
2 tablespoons butter
2 tablespoons extra virgin olive oil
1/4 cup white wine
1 cup chicken stock
1 to 2 tablespoons fresh lemon juice
2 tablespoons capers
2 tablespoons fresh parsley, rough chopped
Salt and pepper to taste
1. Pound the chicken breasts lightly until they are an even thickness. Season with salt and pepper; dredge in flour, shaking off any extra.
2. Preheat the oven to 200 degrees.
3. Heat a sauté pan over medium heat and add the butter and olive oil.
4. Gently sauté the chicken until golden brown and crisp, 4 to 5 minutes. Flip and repeat. Continue to cook until the chicken is cooked through. Transfer to a platter and cover with foil. Place in the oven to keep warm.
5. Drain off any fat from the pan and return to medium heat. Deglaze with the wine, lifting off any fond. Add the stock and reduce by half of its original volume.
6. Finish with lemon juice, capers, parsley, salt and pepper to taste. Pour the sauce over the warm chicken and serve.
Once again, you'll hear us say how working with larger portions such as whole fish can save you money, just as we have throughout this entire guide. By buying whole fish, you'll also know exactly how fresh your filets are and how many people have handled them.

To filet a fish, lay it on its side to first remove the head. With a sharp Chef's knife, make an incision just past the gills and pectoral fins and apply pressure to cut through the spine. Cut all the way through to remove the head.
From here, you can cut the fish into steaks with bones in them or filet the entire fish. Crosscut steaks are a great choice for grilling because the skin and bones help keep the fish from falling apart on the grill.
If you'd rather filet your fish, start at the head of the fish and run your sharp boning knife along the spine just above the dorsal fin, all the way to the tail. That will remove one whole filet in one piece and leave the spine behind. Turn the fish over and the same on the other side.
Any belly fat will need to be trimmed off next. You'll also want to remove tiny bones called pin bones from the middle of the filet. Some can be plucked out by hand, others may require needle-nose pliers to get the job done.
Once you have your two filets, you can choose to keep them whole or cut into serving size portions, depending on the size of your fish. You can also leave the skin on or remove it. Shelley shows you How to Skin and Portion Fish in this video.
Fish can be purchased in many forms, but these days it is most commonly sold in fillets or steaks that are ready for cooking. Fillets are best for baking, frying, poaching, and sautéing, while steaks are excellent for grilling and broiling.

All seafood is very perishable, and should be used within two days of purchase. Shop at a busy, reputable fish counter so that you know the fish they sell is as fresh as can be. Fresh fish smells clean, like the ocean. If there are whole fish on display, they should appear shiny and firm, and their eyes should look clear. Cut fish should look moist and translucent, with a pink rather than brownish tone. The grain should be smooth; no spaces should appear between the flakes.
Farm-raised fish like trout, Atlantic salmon and catfish are consistent in uniform quality and freshness.
Pro Tip: If you purchase (or catch!) more fish than you are able to cook within one or two days, freeze it as soon as possible. Fillets and steaks can be wrapped individually in plastic wrap. Freeze them on a cookie sheet until solid so that they reach a frozen state quickly, then place in labeled plastic bags. Thaw in the refrigerator. Properly handled, frozen fish tastes very close to fresh.
There are two basic types of fish: lean and fatty. Examples of lean fish include sole, trout, halibut, whitefish and sea bass; the fatty fish include tuna, mackerel, swordfish, mahi mahi, and salmon. The leaner fish are more delicate in flavor, while the fattier fish contain more oils and can stand up to more intense cooking methods and flavors like grilling and baking.
Pro Tip: Ask your fishmonger to cut steaks at least 1 inch thick to help prevent overcooking. Request that fillets be cut at an angle so that they lie flat in a pan or on the grill.
Fish cooks very quickly, and will taste dry and tough if overcooked. Fish should be cooked until just opaque; it should remain “pearly” and shiny in the center.
Pro Tip: Use an instant read thermometer to check if your fish is cooked properly. When cooked, the flesh should reach an internal temperature of 140°.
Poaching is the gentlest method of cooking, and is used for delicate foods like fish, fruit, and chicken. Poaching can be defined as “gently simmering in a flavorful liquid.” Key words are “gently” (the French define poaching as a smile and boiling as laughter) and “flavorful” (because the liquid should impart flavor to the food as it cooks). If the simmering turns to boiling, the delicate item being cooked may break apart or become tough from its exposure to such rough treatment. Often when poaching fish, we don’t even simmer at all, but just turn off the heat and allow the fish to cook in its hot bath.
The type of flavorful liquid used for poaching varies with the food being poached. Delicious alternatives include stock, wine, or court bouillon for meat, vegetables, and fish, or syrups made from liquor, fruit juice, or water and sugar for dessert poaching. The lower the cooking temperature, the more flavor the liquid imparts. When cooking fish or poultry, use a more assertively flavored liquid, preferably containing an acid (such as wine) to increase flavor.
Pro Tip: Fragrant and flavorful poaching liquids can really enhance the taste of foods. Court bouillon (a mixture of equal parts water/wine/stock) can be flavored with aromatic vegetables, fresh or dried herbs, and all types of whole spices.
Bring the poaching liquid to a boil before adding the food to help the flavors infuse. The liquid should never boil once the food is in it, however, so watch carefully and lower the heat once the pot starts to simmer. You should see small bubbles surfacing but not a rolling boil.
Foods get even more intense flavor and retain moisture from their poaching liquid when they are allowed to cool while still submerged. Remember to undercook the item being poached if you plan to cool it in liquid; it will continue to cook as it cools and absorbs the liquid.
Yield: 4 servings
Active time: 10 minutes
Start to finish: 20 minutes
Four 5- to 6-ounce salmon fillets, boned and skinned (from chef demo)
About 1 cup white wine
About 1 cup fish stock (from earlier in the day)
Orange peel, mire poix, fennel, herbs and/or black peppercorns (optional)
Salt and pepper to taste
1. Butter the bottom of a deep 12-inch heavy, nonreactive skillet, and arrange the salmon in it.
2. Add 1 cup wine and enough fish stock to just cover fish. Add citrus peel, mire poix, herbs and/or spices. Top with a round of buttered parchment paper, buttered side down.
3. Bring to a simmer over moderately high heat, then reduce heat and poach at a bare simmer until salmon is just cooked through, 8 to 10 minutes from the time the heat is turned on. Transfer with a slotted spatula to plates.
Sautéing is an easy method for quickly cooking fish fillets. With a little oil, lemon, fresh herbs, salt and pepper, you can have a flavorful fish dish in just minutes. Shelley shows you how it's done in this How to Saute Fish video.
Sautéed Arctic Char
Yield: 4 servings
Active time: 15 minutes
Start to finish: 15 minutes
2 tablespoons grapeseed oil
4 arctic char fillets, skinless and boneless
Salt and pepper to taste
2 tablespoons butter
2 thyme sprigs
1. Heat a sauté pan over medium high heat and add the grapeseed oil.
2. Season the char with salt and pepper to taste and sear in the hot pan, presentation side down, until golden brown and crisp. Flip and continue to cook the char for an additional minute.
3. Reduce the heat to medium low and add the butter and thyme sprigs. Baste the fish with a large spoon until just cooked. The fish will start to flake around the edges when done but should remain a bit “pearly” in the center.
4. Serve with a dollop of aioli, hollandaise or beurre blanc.
Cooking fish in parchment paper yields moist, tender results with little fuss. The key is a folded seal on the paper packet.

Yield: 4 servings
Active time: 30 minutes
Start to finish: 45 minutes
For the herbed butter:
1 stick butter, room temperature
1 teaspoon lemon zest
1 teaspoon orange zest
1 tablespoon fresh parsley, rough chopped
1 teaspoon fresh thyme, rough chopped
Salt and pepper to taste
For the fish in parchment:
2 tablespoons butter, room temperature
2 leeks, white and tender green part only, cut into medium dice and washed well
1 roasted red pepper, cut into thin slices
1 orange, cut into segments
Four 5- to 6-ounce sea bass fillets (see note, below)
Salt and pepper to taste
1. Preheat the oven to 400 degrees.
2. In a small bowl combine the butter, zests and herbs and cream together with a spoon or spatula. Season with salt and pepper to taste.
3. Cut out four large heart-shaped pieces of parchment paper. Brush softened butter around the edges of the parchment. Place the fish on one side of the heart and season with salt and pepper to taste.
4. Top the fish with the leeks, roasted pepper slices and 3 or 4 orange segments. Place a dollop of the butter on top of the vegetables. Seal the parchment by folding over the other side of the heart, folding in the edges of the paper, and twisting the ends to secure.
5. Place the packages on a sheet tray. Cook until packages become puffy and slightly browned, about 10 minutes. Open carefully and serve in the parchment.
Notes:
The best way to become comfortable with butchering any animal is to practice, practice and practice again. The first time you filet a fish will not be as successful as the tenth time you do it. That's to be expected.
If you are interested in getting hands-on experience with butchery under the guidance of a professional chef, The Chopping Block's Culinary Boot Camp provides that opportunity. This week-long class includes butchery of beef, pork, poultry and fish, just as we've shown you how to do in this guide. It's our most comprehensive cooking class!
We also have a one-day Butchery Boot Camp if you are interested in delving deeper into the art of butchery.
As we mentioned before, Chef Mario Scordato's Whole Hog Butchery is a class you can't miss if watching a whole hog be transformed into your lunch gets you excited.
And finally one resource we absolutely recommend is Chef Kari Underly's book The Art of Beef Cutting. It's geared toward meat professionals but serious home butchers will also find it a valuable tool. This is the only book on the market to include step-by-step cutting techniques and beef fundamentals along with information on all the beef cuts from each primal. Kari is a long-time friend of The Chopping Block, so we are proud to carry her amazing book in both of our stores in Chicago.

