I don’t think there is a season I look forward to more than summer. After a long cold winter, us Midwesterners long for warm weather and sunshine like a dog loves a bone. Without fail, by the time I get to the end of summer I equally long for the crisp, dry and cool days of fall. I look forward to the smell of roasting chickens, simmering stews on the stove and cookies in the oven. Additionally, early fall brings one of the most exciting times of the year for produce: we still have tomatoes, corn, stone fruits and melons but apples, winter squash and late harvest peppers are just starting to hit the farmers markets. It is the perfect time to capture some of these overlapping flavors through some simple preservation techniques.
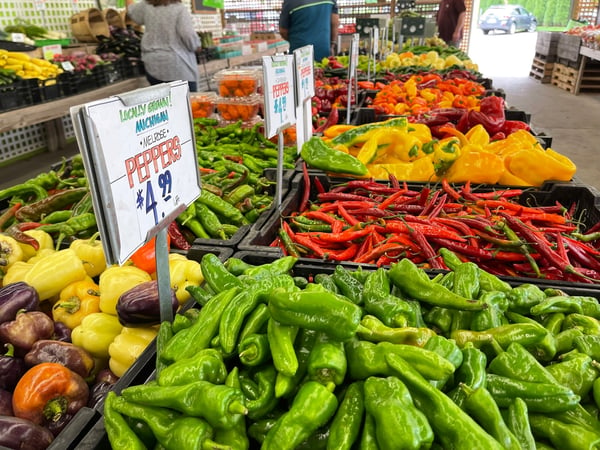
If you enjoy going to the farmers markets, you are likely noticing the overflowing bins of exotic peppers, both hot and sweet. You may be also wondering, what on earth could anyone do with these copious quantities of hot peppers? I’ve got some simple recipes to share with you so you can enjoy these beautiful peppers all year long!

Note: Except for the Hungarian Pepper recipe which requires no special equipment, you will need a canning set up which includes: a canning pot, rack, jar lifter and canning funnel. You will also need 1-quart canning jars and lids and a digital thermometer for taking the temperature of the water will be helpful. Here are links to buy via Amazon as The Chopping Block does not carry the products:
- Granite Ware 21.5-Quart Porcelain Canner with Rack
- Norpro Canning Essentials Boxed Set, 6 Piece Set
- Ball 66000 1 Pint Wide Mouth Can Or Freeze Canning Jars 12 Count
We do carry the digital thermometer so just let us know if we can assist you with that.

Hungarian-Style Pickled Peppers
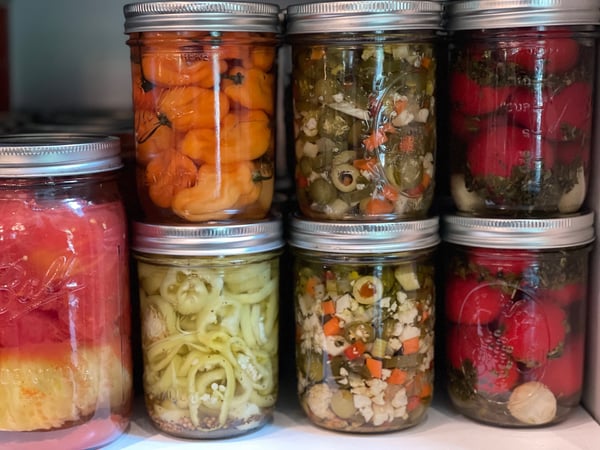
I wanted to start with this recipe because it is so simple it really doesn’t require a recipe; it can literally be made in minutes. These peppers are great served like you would a pickle, put them on a sandwich or Chicago-style hot dog, serve with tacos, smoked or braised meat but most traditionally these peppers are served as a garnish or accompaniment to soups and stews.
Don’t throw out the vinegar when you are done with the peppers, it is wonderful to add to marinades or splash a little on roasted fish or chicken.
Yield: 1 pint
Hands on time: 20 minutes
6 to 8 ounces hot or mild peppers, absolutely any variety you can fit in the jar.
1 to 1 1/2 cups white wine vinegar
Step 1: Prepare Jar
Wash and sterilize a pint canning jar and lid. See our canning guide for instructions.
Step 2: Fill Jars
Italian-Style Marinated Peppers
These classic Italian-style peppers are great used on antipasto or appetizer platters, served alongside grilled or roasted meats, served with a Bloody Mary or eaten straight out of the jar. I like to use the traditional mild cherry peppers but this can be made with hot peppers too.
Hands on Time: 30 minutes
Start to Finish: 24 hours
For the brine:
1 cup pickling salt
8 cups water
For the pickling solution:
7 cups water
1/2 cup salt
1/2 cup white wine vinegar
For the jars:
2 1/2 pounds cherry peppers or any hot or mild peppers
2 teaspoons dried oregano
2 teaspoons dried basil
8 bay leaves
4 cloves garlic, peeled
3/4 cup olive oil
Step 1: Prepare the Brine
Boil water for brine and pour over salt, stir until salt is dissolved. Let brine cool to room temperature.
Place peppers in a bowl and cover with brine, you may have additional brine depending on the bowl you use. Cover the peppers with plastic wrap and weigh down the peppers so they are completely submerged in the brine. A heavy lid or a plate with a heavy object on top works great for a weight. Refrigerate at least 12 hours and up to 24.
It’s a good idea to start boiling your water for processing the peppers at this point. It takes time to get a large stock pot of water to 180 degrees. Fill your canning pot half way full for pint jars.
Wash and sanitize your pint jars (see our canning guide).
Place 2 cloves of garlic, 1/2 teaspoon oregano, 1/2 teaspoon of basil, 2 bay leaves and 3 tablespoon of olive oil in each jar.
Remove peppers from canner and leave at room temperature. The jars will make popping sounds as they seal, this should happen within 30 minutes. After 30 minutes check that the jars are sealed by pushing on the lid, if it doesn’t spring back the jar is sealed. If a jar doesn’t seal you will need to refrigerate the peppers, they won’t be shelf stable but will still be delicious.
These Italian peppers will last for 6 months on the shelf or a year in the refrigerator. The oil makes them slightly more perishable than the other recipes I have provided.
Banana/Sandwich Peppers
There is nothing like a crunchy, vinegary, sometimes spicy and sometimes sweet banana pepper on a sandwich. Feel free to use other peppers but my personal favorite is a banana pepper, use all sweet banana peppers, all hot banana peppers or mix them up like I did for a semi hot pickled pepper. If you like a sweet and spicy pickle, add the optional sugar listed below.
Start to Finish: 24 hours
For the brine:
1 cup pickling salt
8 cups water
For the pickling solution:
7 cups water
1/2 cup white wine vinegar
For the jars:
2 1/2 teaspoons mustard seed
2 1/2 teaspoons celery seed
6 garlic cloves
2 tablespoons sugar, optional
3 1/2 pounds of banana peppers, sweet or hot, or a combination
Step 1: Prepare Brine
Boil water for brine and pour over salt, stir until salt is dissolved. Let brine cool to room temperature.
Step 2: Brine the Peppers
Rinse the peppers and slice them in about 1/4-inch thick slices. Wear plastic gloves if using hot peppers! I leave the seeds intact but if you are using hot peppers, keep in mind this adds additional heat so you may want to remove them. I don’t have the patience for that!
Place peppers in a bowl and cover with brine, you may have additional brine depending on the bowl you use. Cover the peppers with plastic wrap and weigh down the peppers so they are completely submerged in the brine. A heavy lid or a plate with a heavy object on top works great for a weight. Refrigerate overnight, at least 12 hours and up to 24.
It’s a good idea to start your water for processing the peppers at this point. It takes time to get a large stock pot of water to 180 degrees. Fill your canning pot half way full for pint jars.
Wash and sanitize your pint jars (see our canning guide).
Place 1/2 teaspoon of mustard seed, 1/2 teaspoon of celery seed, 1 garlic clove and optional 2 tablespoons sugar into the clean sterilized jars.
Prepare pickling solution by heating water and vinegar over a medium heat. Stir until salt dissolves and keep hot until needed.
Drain and rinse banana peppers, wear gloves if using hot peppers. Stuff the peppers equally into the pint jars and to with hot pickling solution and place the lid on the jar.
When jars are all stuffed, place the jars into the canning pot. The water should be between 180-185 degrees for peppers. Cook peppers covered for 15 minutes.
Remove peppers from canner and leave at room temperature. The jars will make popping sounds as they seal, this should happen within 30 minutes. After 30 minutes check that the jars are sealed by pushing on the lid, if it doesn’t spring back the jar is sealed. If a jar doesn’t seal you will need to refrigerate the peppers as they won’t be shelf stable.
The sealed sandwich peppers are shelf stable and will last a year.
I hope you enjoy these recipes and delight your friends and family all year with them. People are always so impressed when you pull something truly homemade out of your pantry to share. Friends also love it when I show up at their house with a gift of a homemade item like pickled peppers.
So much of what we do is about sharing our love of food and cooking, and we are finding more and more ways to do that. I am sure you know about our virtual classes at this point but did you know we are doing hybrid events and classes now, too? Come in person, safely and in small groups in our kitchen, or join virtually from your home - it’s the best of both worlds and a new way to connect. We hope to see you soon in whatever way you choose to learn with us.
