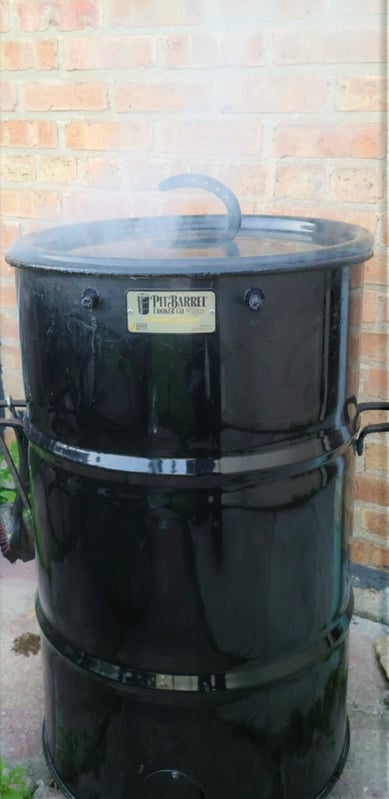
If you are like me, you would agree that summertime is the best time for cooking. With the gorgeous weather, cooking and eating outdoors just can’t be beat. All of the bountiful produce from the farmers markets and great deals on large cuts of meat make grilling outside one of my favorite past times. I love firing up my charcoal grill all year round if I am being honest, but I want to focus on my cooking adventures with my pit barrel smoker and smoking in general.
If you have never heard of the pit barrel, it is a steel drum smoker that utilizes charcoal for a heat source as well as wood for flavor at the bottom to cook the ingredients hanging or on the grate above. This ensures full surface area of smoke flavor that is truly magnificent. I am going to discuss different types of smokers, wood to use, temperature guidelines, and how to smoke even if you do not have a designated smoker so you feel confident having your own summertime smoke out.
So, what is smoking and why do we do it? Well in this blog, I am referring to barbequed meats, but it also refers to a drying and preserving method of preparing foods, a practice that has been done for thousands of years. A common misconception is that “barbecue” is any kind of meat cooked on the grill, or over open flame. You’ll often hear people say they are “barbecuing” this weekend, when really, they are just grilling some chicken and burgers out back. In my opinion, true barbecue refers only to slow-cooked meat over indirect heat, flavored by smoke, until it reaches that soft, juicy, delicate state we all know and love.
Types of Smokers
There are so many different kinds of smokers on the market right now, and they all have their pros and cons. I suggest really doing your research and finding the right one that will work for you. I just happen to really love my Pit Barrel and this is in no way a paid endorsement but merely a statement on how I cook at home. These are the four most basic types of smokers; I will not go in depth but offer a short explanation of each.
Gas: Don’t naturally produce smoke, so wood chips and propane are used to create the smokey flavor. The temperature is easy to control compared to a charcoal or pellet smoker.
Charcoal: Use of wood and charcoal provide deep smokey flavor. The set up takes more time than gas or pellet and it is vital to control the airflow in order to achieve greatness.
Pellet: Compressed sawdust “Pellets” are fed into the firebox to provide smoke and heat but also need electricity to run. They are versatile as a grill, smoker, and oven all in one.
Electric: Very easy to use, for the "set it and forget it" kind of smoking you may be looking for. For that luxury though, you sacrifice the true smoke flavor that comes with combustion.
Wood Choices
One of the main reasons to smoke meat is, of course, to get all that delicious smoke and wood flavor in the meat. The kind of wood also has some effect on the final flavor.
Here are some of my favorite choices:
Hickory: A very common choice for smoking, thanks to the very strong smoky flavor it imparts; it’s reminiscent of bacon.
Oak: A very popular choice; it’s easy to find, well-rounded and works with almost anything you throw on the grill.
Apple: Provides a sweet fruity flavor, perfect for game, lamb, pork or poultry.
Alder: Delicate wood that is common in smoking salmon but works with most fish or poultry.
Cherry: Sweet and mild flavor that works great for game meats.
Mesquite: Is the hottest burning wood and has a strong earthy flavor that compliments most large cuts of meat.
Cedar: Everyone has heard of cedar planks, but did you know you can only use Western Red Cedar?
Note: Be sure to avoid pine and other sappy woods, which flare up, create a lot of smoke, and give off a bitter, unpalatable flavor. You also want to find wood that has been properly dried and aged or cured. Kiln dried wood is very low in moisture and thus burns much hotter and faster, while naturally-cured wood might have a bit more water in it, burning more slowly and creating more smoke for more flavor.
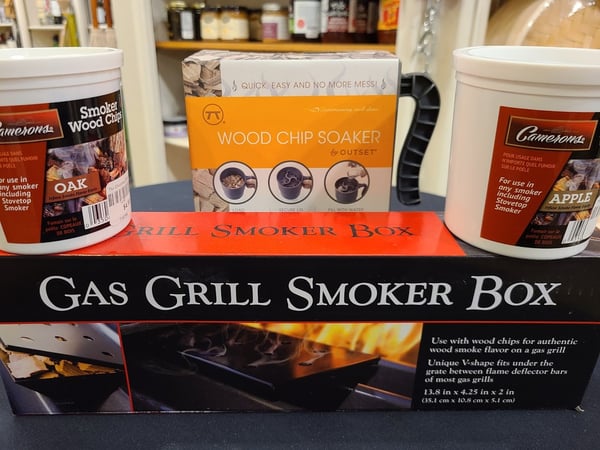
A quick lesson on the differences between smoking to cook meat and imparting smoke flavor to your food. There is the soaking wood chips in water and throwing them on your charcoal or gas grills technique. The amount of wood chips used will impart as much or as little smoke flavor to your foods as you like but is not what is overall cooking the product. The more you put on and the more time allotted on the grill will give your foods an intense deep smoke flavor, but be careful you don’t leave them on too long otherwise you may over cook the proteins. You can use the products we carry at The Chopping Block shown above to smoke on your gas grill at home.
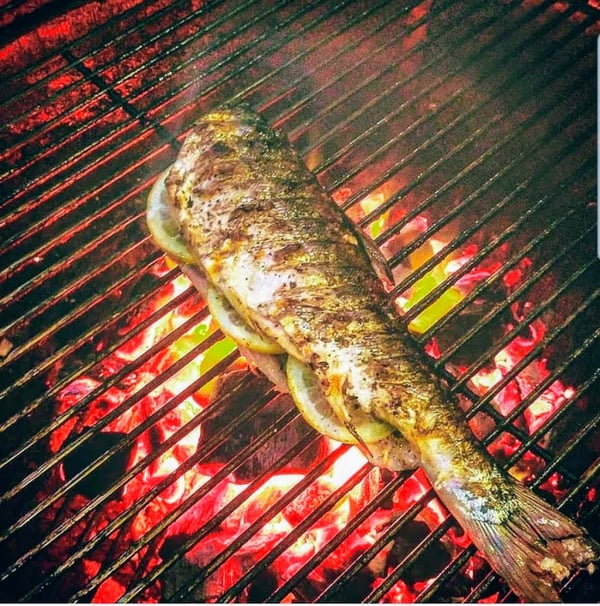
I do this method of grilling/smoking on my Weber charcoal grill when I am cooking lean proteins, veggies, and other general food items that don’t need to cook for very long on the grill, but I still want to have that smoke flavor. Sometimes with charcoal grills it is difficult to control the overall heat of the grill so by cooking at a higher temperature and adding soaked wood chips to the charcoal you are adding flavor, and you do not have to man the grill for hours on end. For example, this grilled and smoked stuffed Coho salmon my husband caught pictured below on the Weber:
Then there is the slow and low method of smoking. When I think of smoked meats, I generally think of large cuts that need hours to cook through at a low temperature in order to become tender. For example, ribs, brisket, pork shoulder, or whole chickens are my go-to proteins on my Pit Barrel smoker. Cooking over high heat tends to dry the meat out very quickly. Any moisture within the meat is essentially blasted out, leaving it tough, dry and difficult to chew.
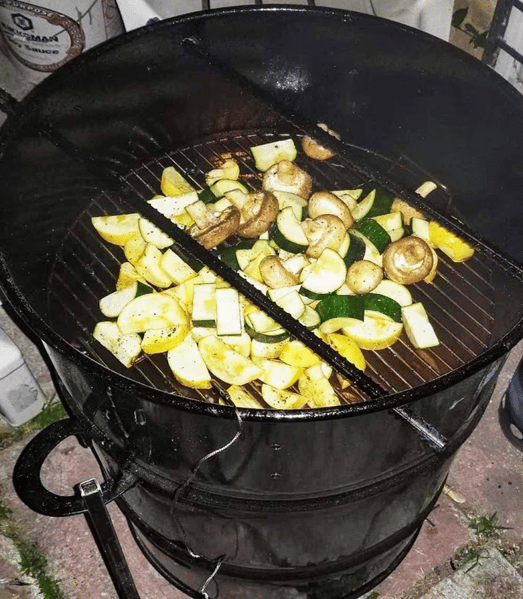
For delicate meats, cooking over high heat also means that you have less control over the final product, as the internal temperature can quickly rise beyond your desired temperature before you realize it. Smoking meat low-and-slow, on the other hand, keeps the moisture from evaporating too quickly, allowing you to achieve the perfect combination of tenderness and juiciness. That doesn’t mean the occasional vegetable won’t find its way on the Pit Barrel. Yes, you can smoke veggies as well!
Unlike traditional grills which cook food from a single direct heat source; the cylindrical shape of the Pit Barrel and the practice of hanging the protein from above keep the food in the center of the action, heating the meat from all sides at once.
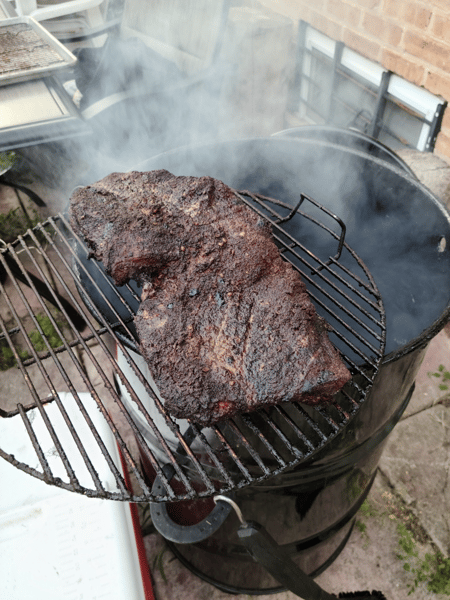
In addition to cooling the bottom of the meat, the dripping juices fall onto the hot coals, producing a smoke fog which fills the barrel and envelops the meat, infusing it with even more natural flavor. Of course, this is not to say that grilling on the grate won’t yield equally impressive results. Similarly, to hanging the meat, the greater distance between the heat source and the grate serves to reduce “hot spots” and cooks the meat more evenly on the bottom and the top.
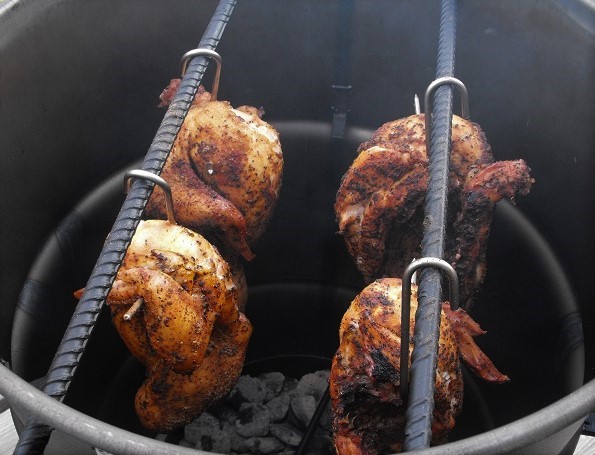
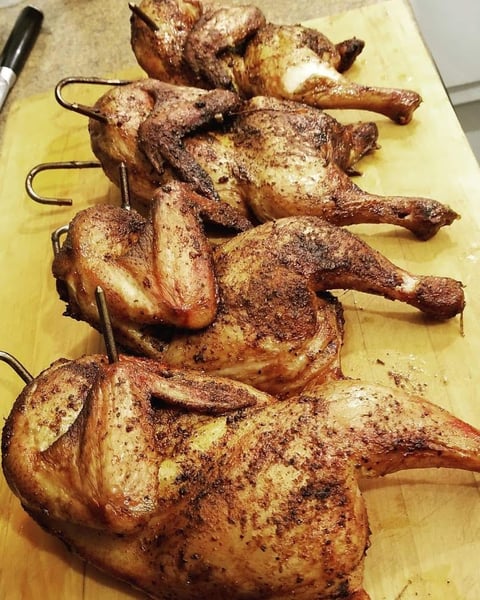
These apple wood smoked chickens were in the Pit for 2.5 hours, they are cooked through, yet still juicy with a slight crisp to the skin and the bones pull right off. And the smoke flavor is incredible!
When you are setting up the pit, you need to get the charcoal started first. I use a chimney coal starter to get some of my coals hot. Once they are going, I dump them into the bottom of the barrel in the coal chamber with the rest of the coals. I then add my wood to the coals and mix them in so some of the wood gets buried. Below I have provided a general temperature and timing chart for reference to guide you in your smoking journey. These are just guidelines and I recommend using a probe thermometer to ensure smoker temp as well as internal temperature. In general, when you are smoking you usually want to stay around 250 to 300 degrees. That is the sweet spot of cooking low and slow.
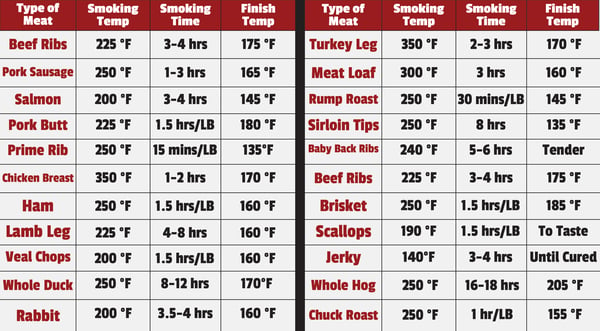
Chart from Pit Barrel Cooker Co. User Manual
One of the biggest things I have learned since I began using my smoker is that air flow and controlling the vents are key to maintaining the temperature of the smoker. I also want to point out that large cuts of meat like to stall out (aka not rise above temp) at certain times and not to fret. At this point in the cooking process, I like to wrap my brisket in uncoated butchers’ paper which help keep the bark from getting soggy. The bark we all know and love is the crispy outside of barbequed meats that contains that epic smoke ring. That's opposed to wrapping it in foil, which creates a steamer effect that could make the outside softer yet help achieve the proper temperature. There are numerous different debates on this fact, and I have done both methods depending on what I am cooking.
There is so much that I could talk about when it comes to smoking, grilling and barbequing meats. It is one of my favorite subjects! This blog only scratched the surface. If you have other questions on smoking technique or want a more hands on approach to learning, check out our Grilling Boot Camp at Lincoln Square where I can answer all of your BBQ questions you may have in person. We are also offering live grilling demonstration classes on the weekends on our outdoor patio.


